Send your first campaign
In this tutorial you will connect a mailbox, look at your sending domain, bring in a small CSV, put those people on a list, write one email, send yourself a preview, and start the campaign. At the end you will have real mail going out at a real pace, and you will know where to watch it.
Set aside about half an hour. Use a small file, twenty or thirty rows, of people you are genuinely happy to email. Everything you do here is real. The preview is a real message and the campaign is a real send.
You will need a computer for parts of this. Writing a campaign and mapping an import are done on a wide screen. Watching a campaign works fine on a phone.
Step 1: Connect one mailbox
Section titled “Step 1: Connect one mailbox”- Open Settings, then Accounts under the Workspace group.
- Choose Connect a Google account.
- Pick the mailbox you want to send from and leave every permission ticked.
- Google returns you to Accounts with the banner Mailbox connected., and the mailbox appears in the list with a Connected badge.
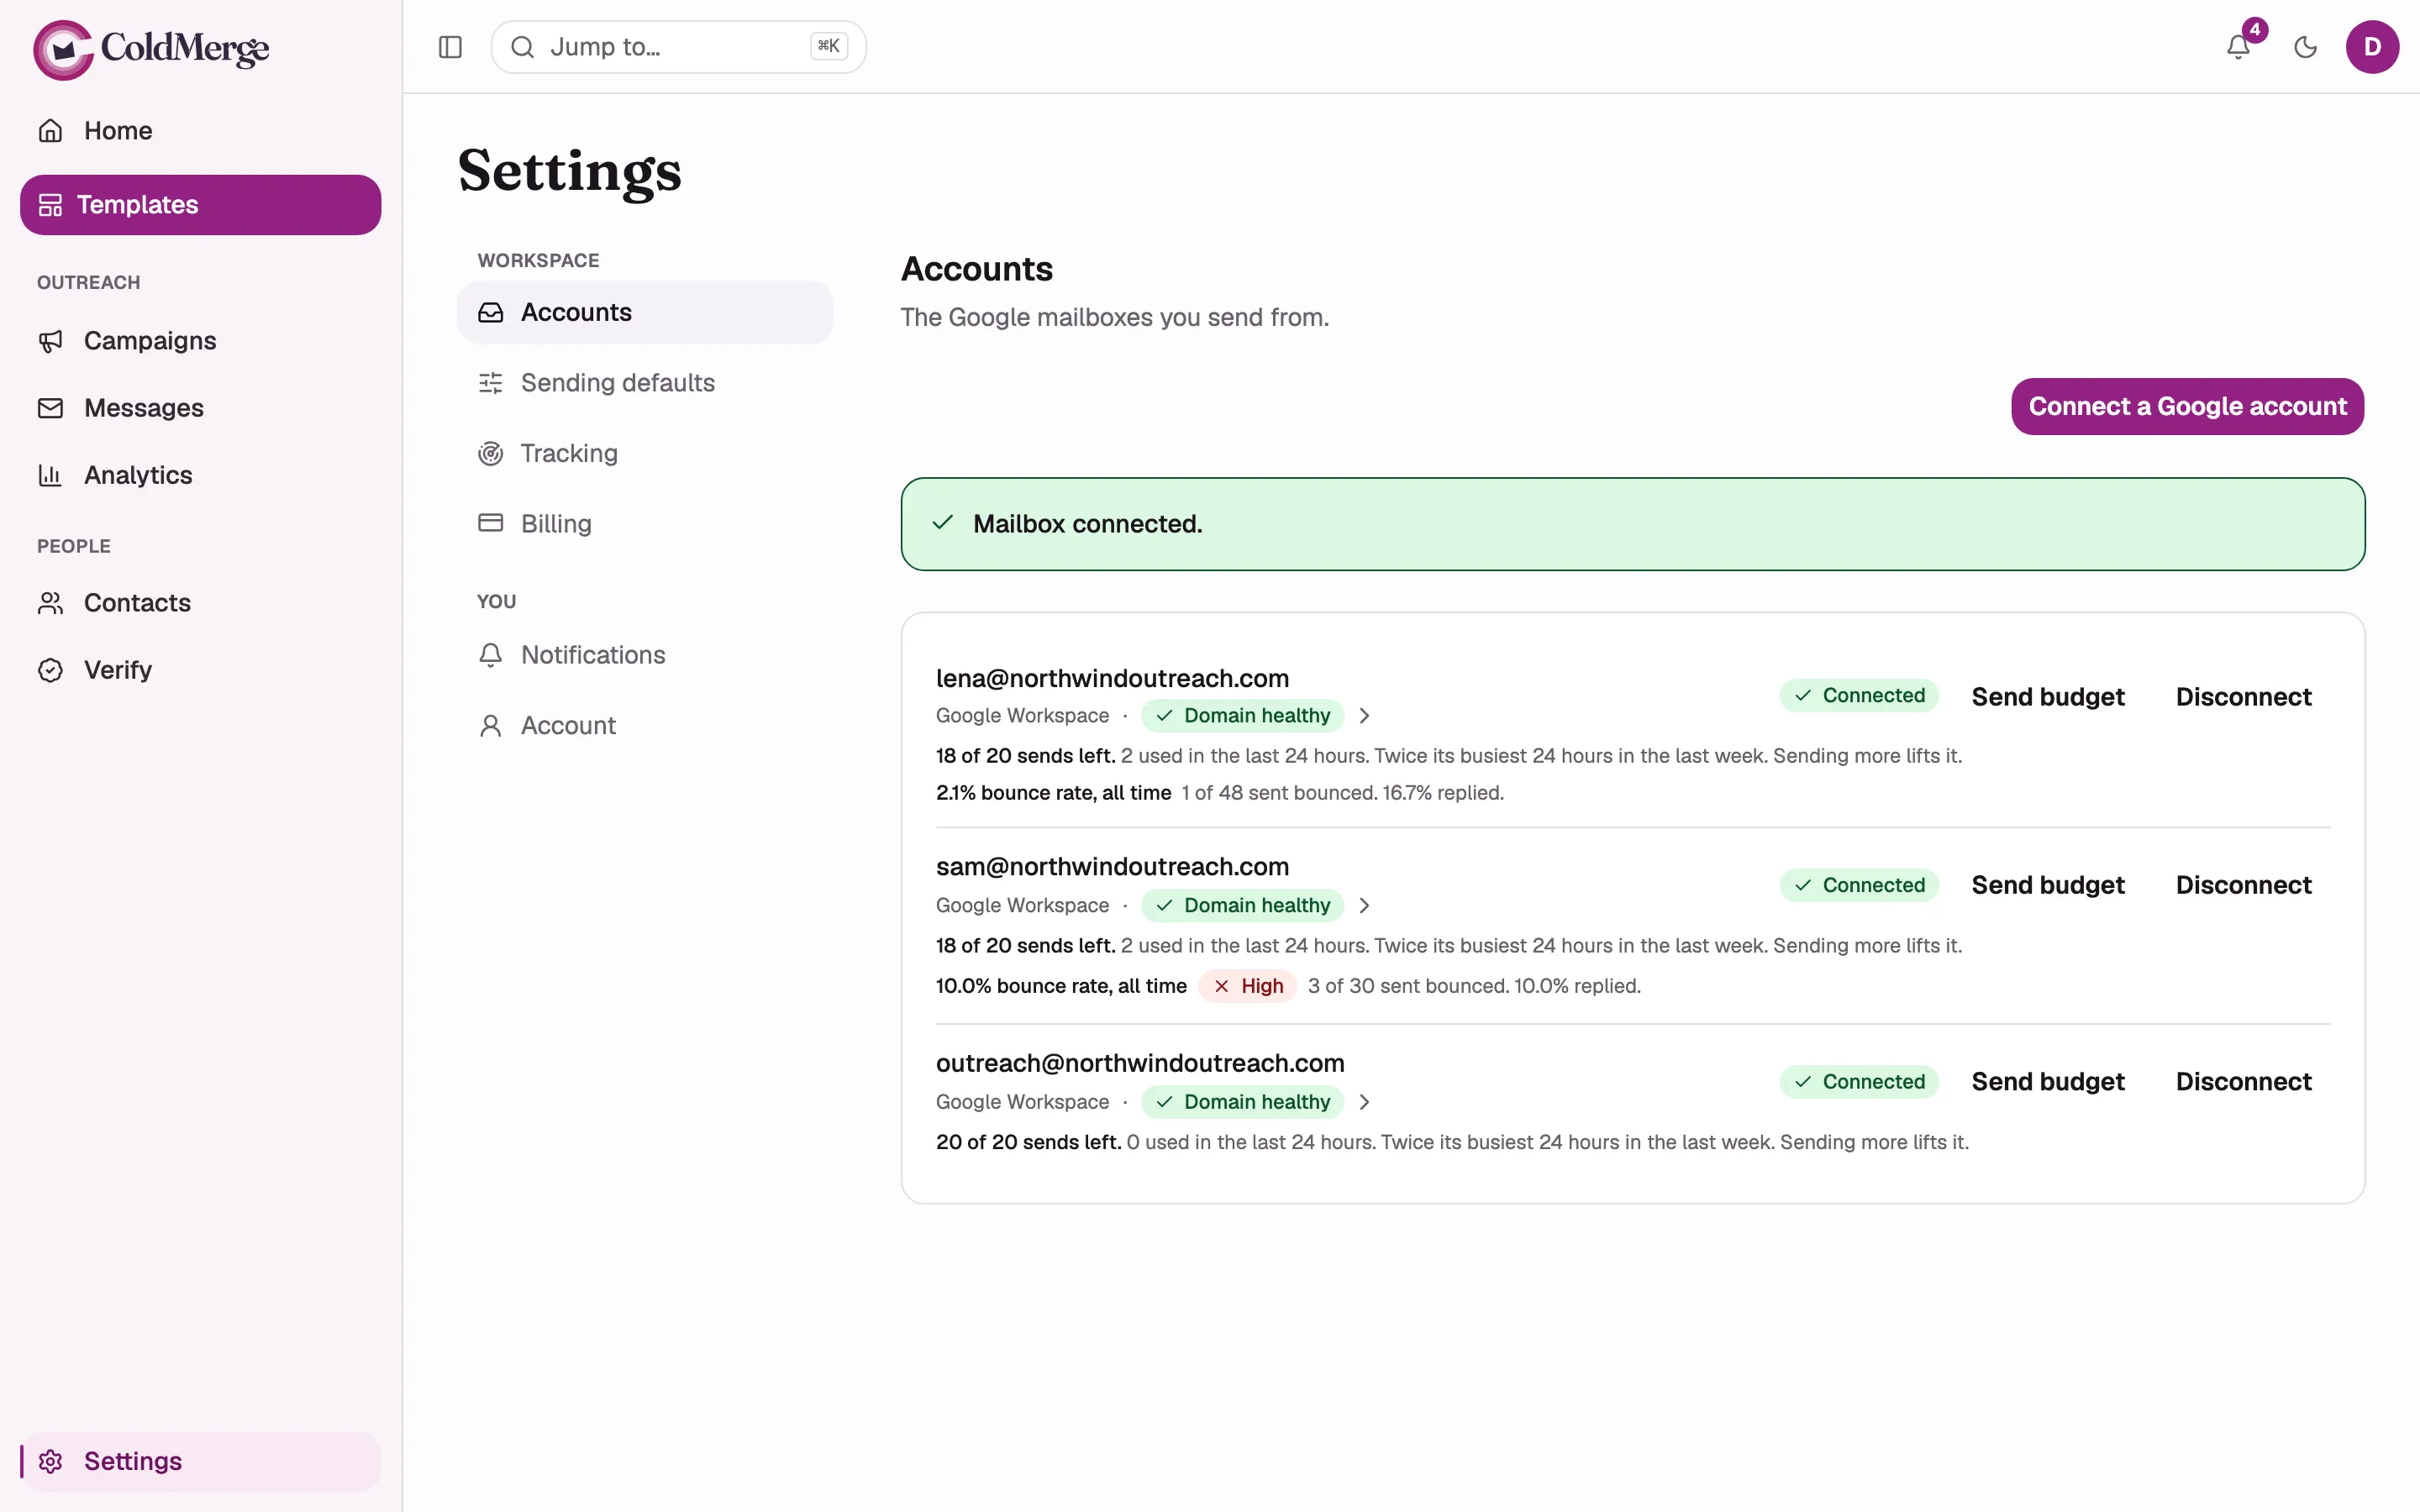
If anything went differently, the banner explains it. Every outcome is listed in How do I connect my Gmail?
Step 2: Look at your sending domain
Section titled “Step 2: Look at your sending domain”If your mailbox is on your own domain, ColdMerge checks how that domain is set
up for email. A free Gmail address has no domain of its own, so if you are on
@gmail.com you can skip straight to step 3.
- On the Accounts row, choose the domain badge (Domain healthy, Domain needs attention, Domain unverified, or Weak policy).
- The domain page opens with a summary at the top and three cards below it: SPF, DKIM, and DMARC.
- Choose Re-check now if you have just changed a DNS record. A caption below the button says when the domain was last checked.
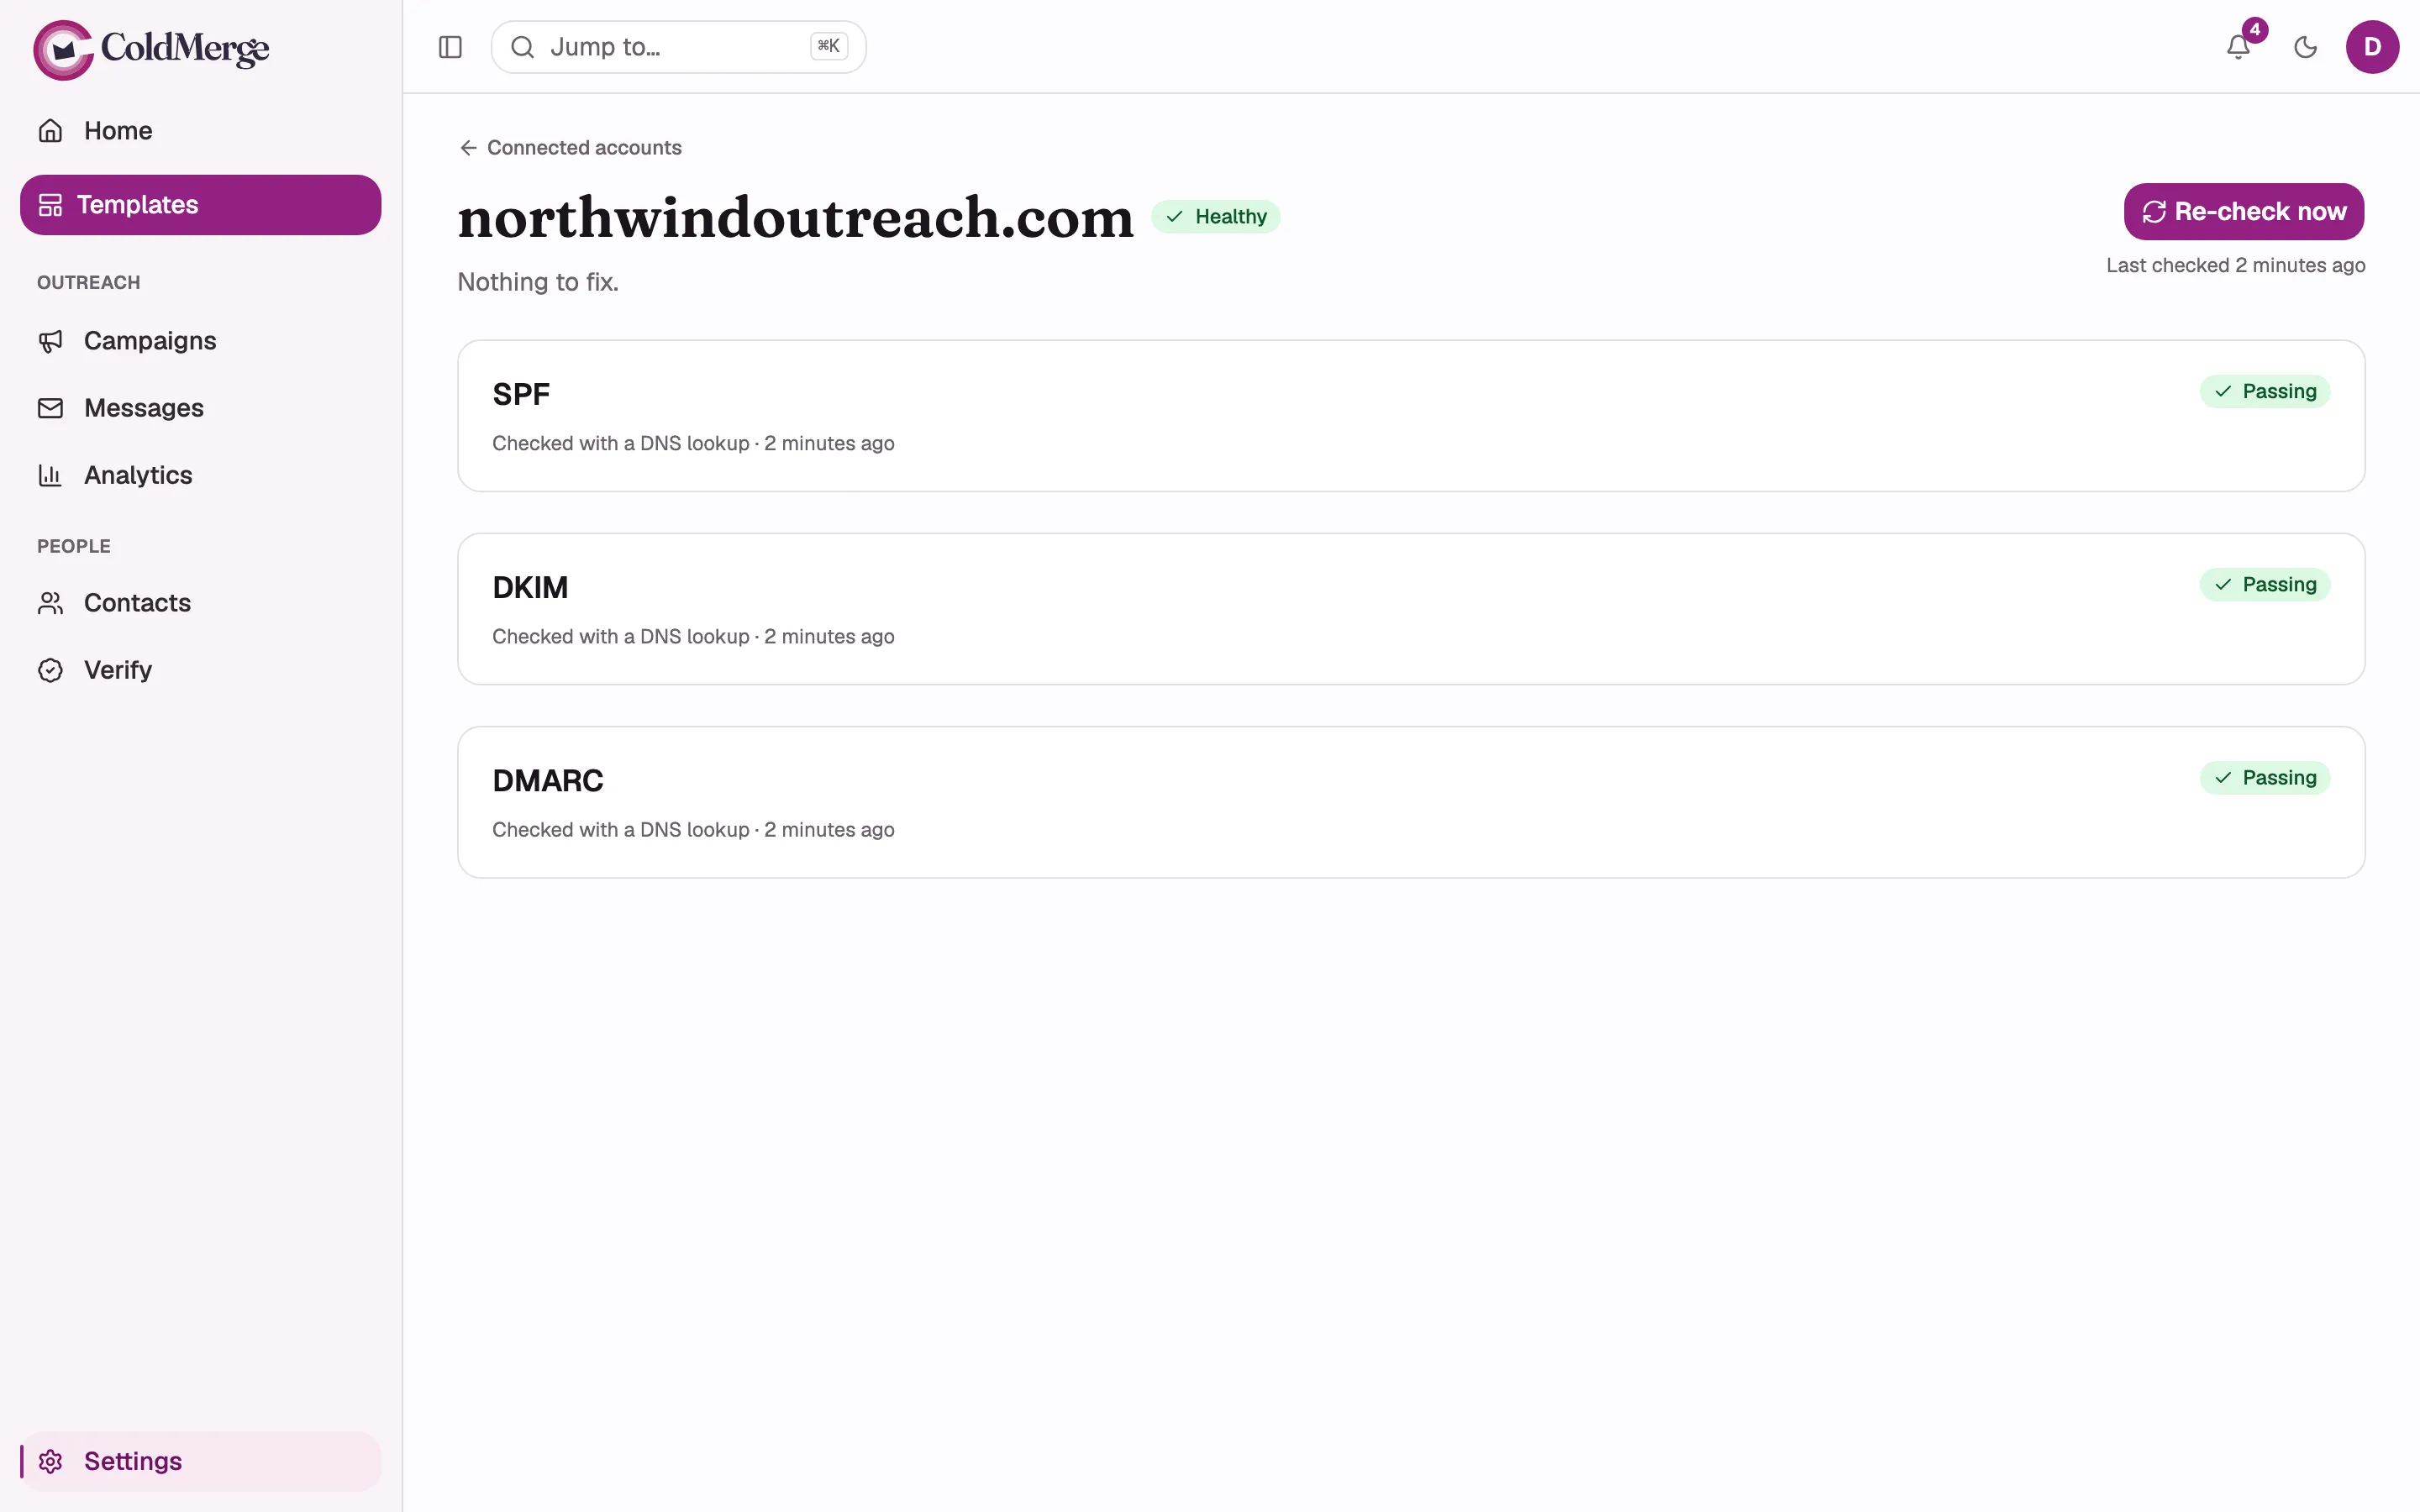
Read the summary line, not just the colour. Most findings here warn you without stopping anything, and the page says so. The one thing that will hold a launch back is a DKIM signature that ColdMerge has proved does not line up with your domain. If that happens the page shows you the exact record to publish and a button to check again. SPF and DMARC findings never block a launch.
You do not have to finish this step to keep going. Come back to it while your first campaign is small.
Step 3: Import a small CSV
Section titled “Step 3: Import a small CSV”- Open Contacts, then the Imports tab.
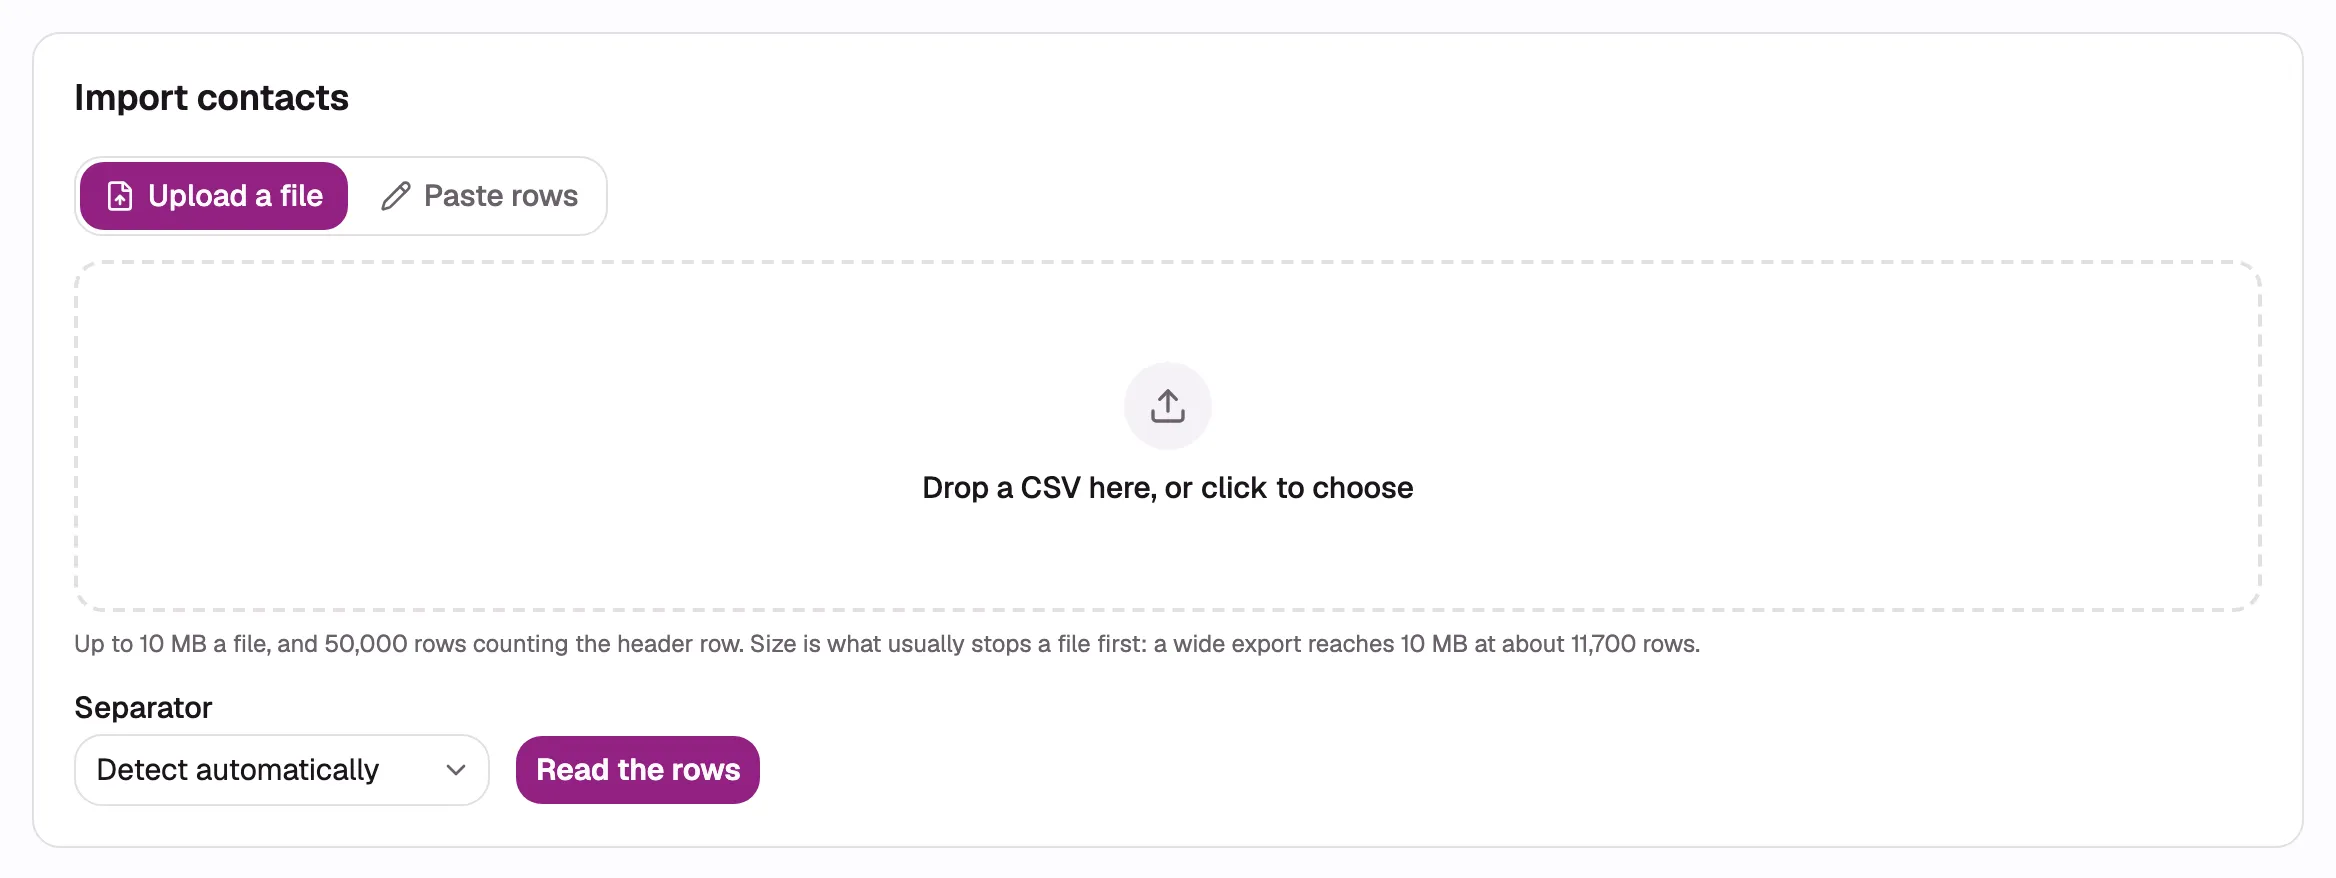
- In the Import contacts card, drag your CSV onto the dropzone, or switch to the Paste rows tab and paste the rows straight in.
- Leave Separator on the detect option unless you know your file uses something unusual, like tabs.
- Choose Read the rows.
The limits: a file can be at most 10 MB and 50,000 rows counting the header row, and it must be saved as CSV UTF-8. A refusal names which limit was hit. Full detail in the CSV format.
ColdMerge reads the file and refuses it at the door if it is too large, or if no column in it reads like email addresses. The message tells you which it was. Nothing has been written to your contacts yet.
Map the columns
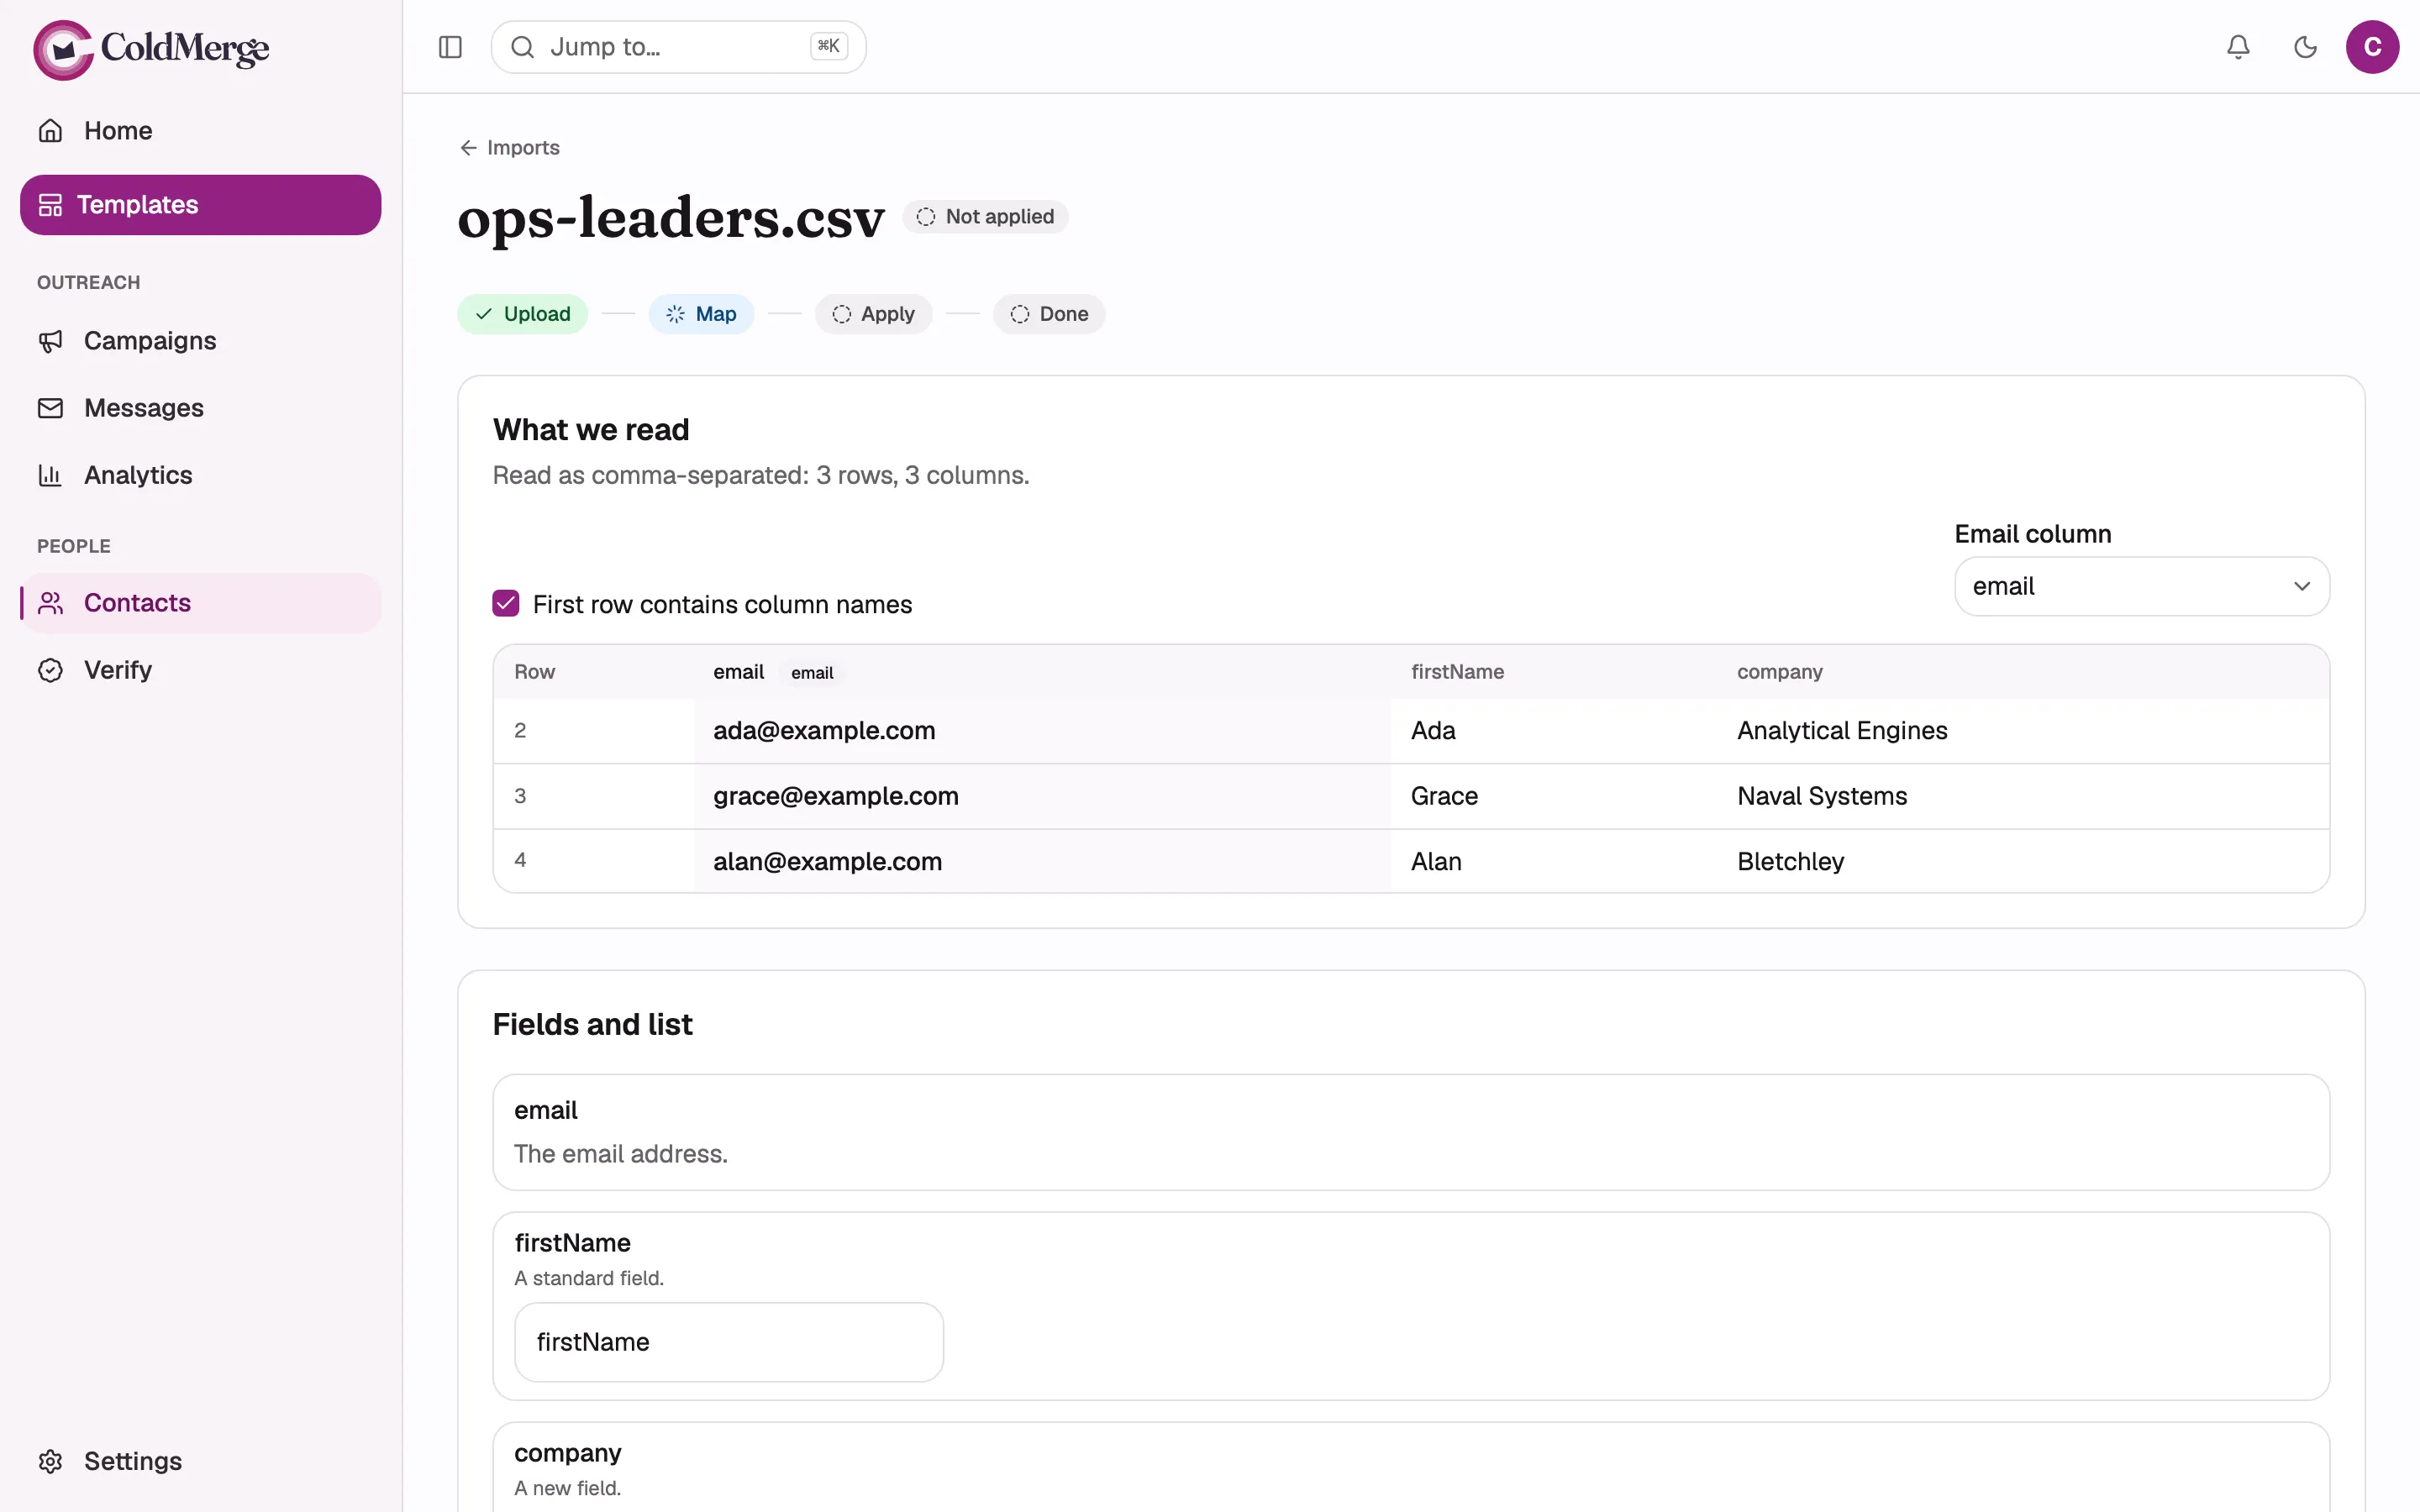
Section titled “Map the columns”You now land in the import wizard, which shows four steps across the top: Upload, Map, Apply, Done. You are on Map.
- Check the preview table. If ColdMerge guessed wrong about whether your first row is a header, toggle that and the preview redraws.
- Check that it picked the right email column. If not, pick the right one, and the preview redraws again.
- Give each column a field name. Those names become the merge fields you can
drop into an email later, so
firstNamehere is what you type as{{firstName}}in your message. - Choose where the contacts go. This is where you make your first list: open the destination picker and choose Create a new list…, then name it something you will recognise, like “First test list”.
- Choose Save mapping.
Three kinds of column will not become a merge field, and the wizard says so next
to the column: a header with awkward characters in it, a column called email
(because {{email}} is already built in), and any column you leave unmapped.
Apply it
Section titled “Apply it”Choose Apply import. This is the moment anything is written.
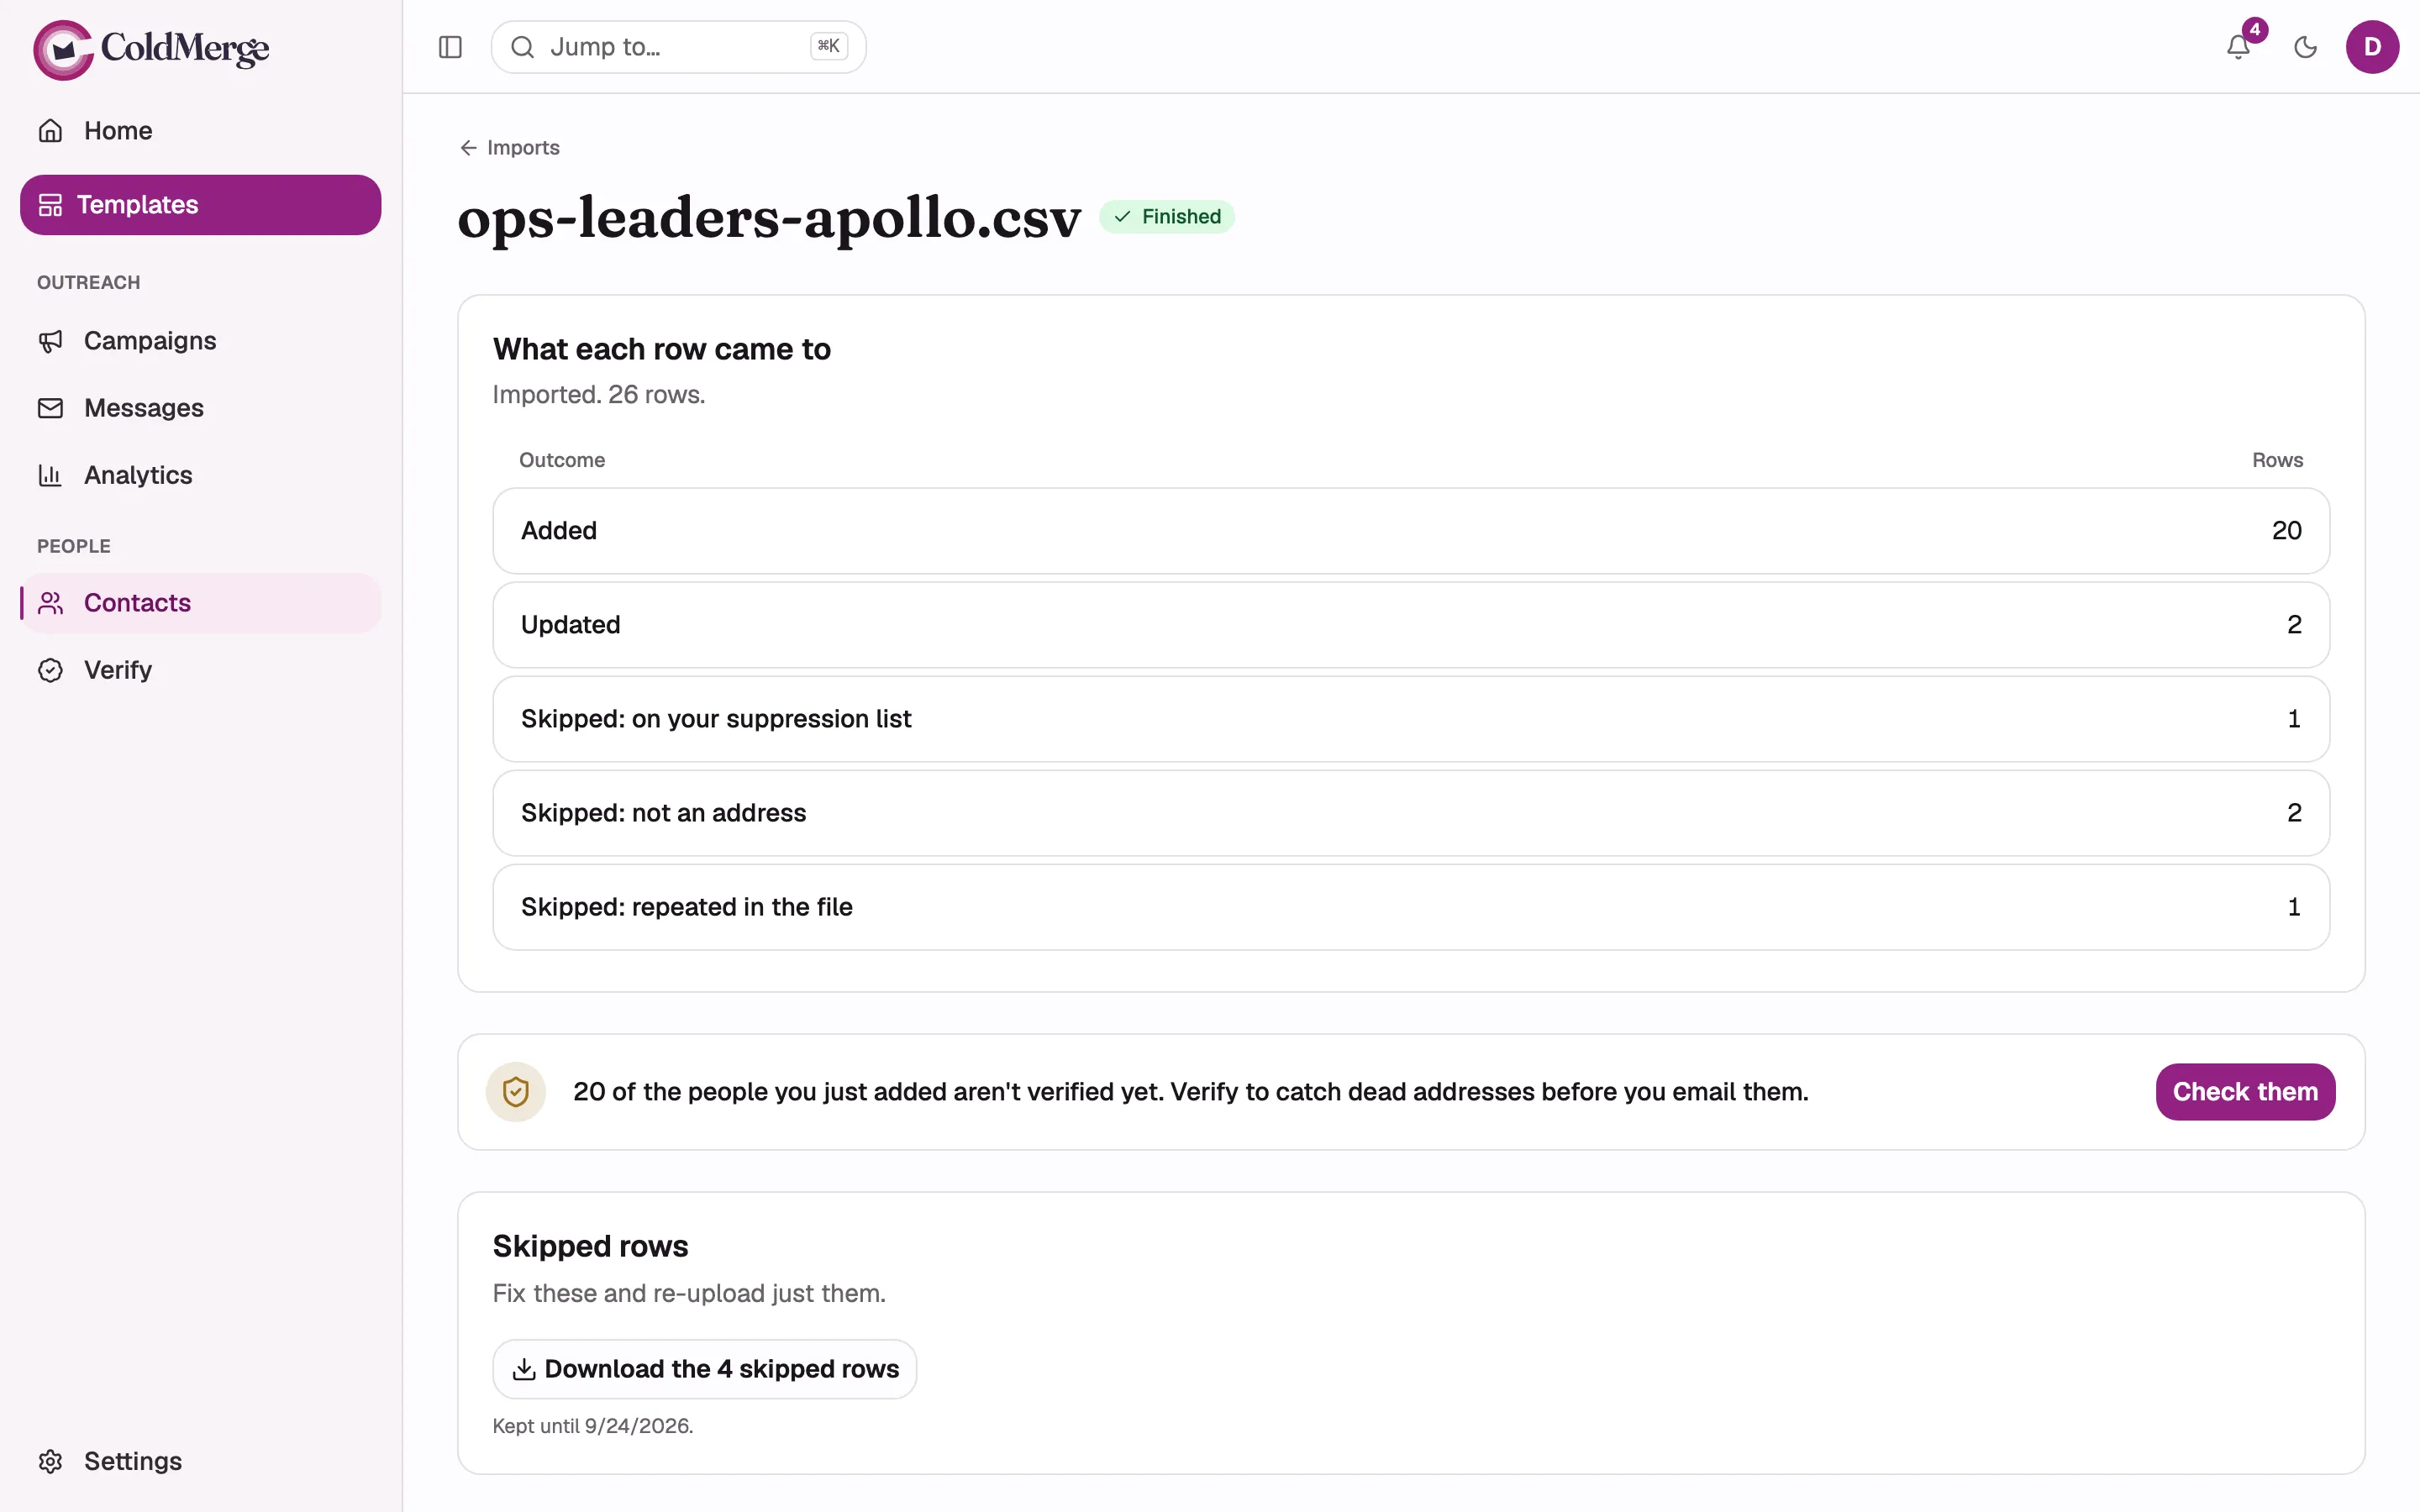
The page turns into a progress view titled Importing and updates itself while it runs. When it finishes you get a summary: how many contacts were created, how many existing ones were updated, and how many rows were skipped, with the reason. You can download a skip report to see exactly which rows those were, and there is an Undo action that removes the contacts this import created, if you want to start over.
Step 4: Check your list
Section titled “Step 4: Check your list”Open Contacts, then the Lists tab. The list you made during the mapping step is there with its contact count.
Open it. From here you can rename it, add more people by hand, remove someone, and, when you have another file for the same list, use Import into this list so the destination is already chosen for you.
You can also make a list on its own, without an import: on the Lists tab choose New list, give it a Name and an optional Description, then choose Create list.
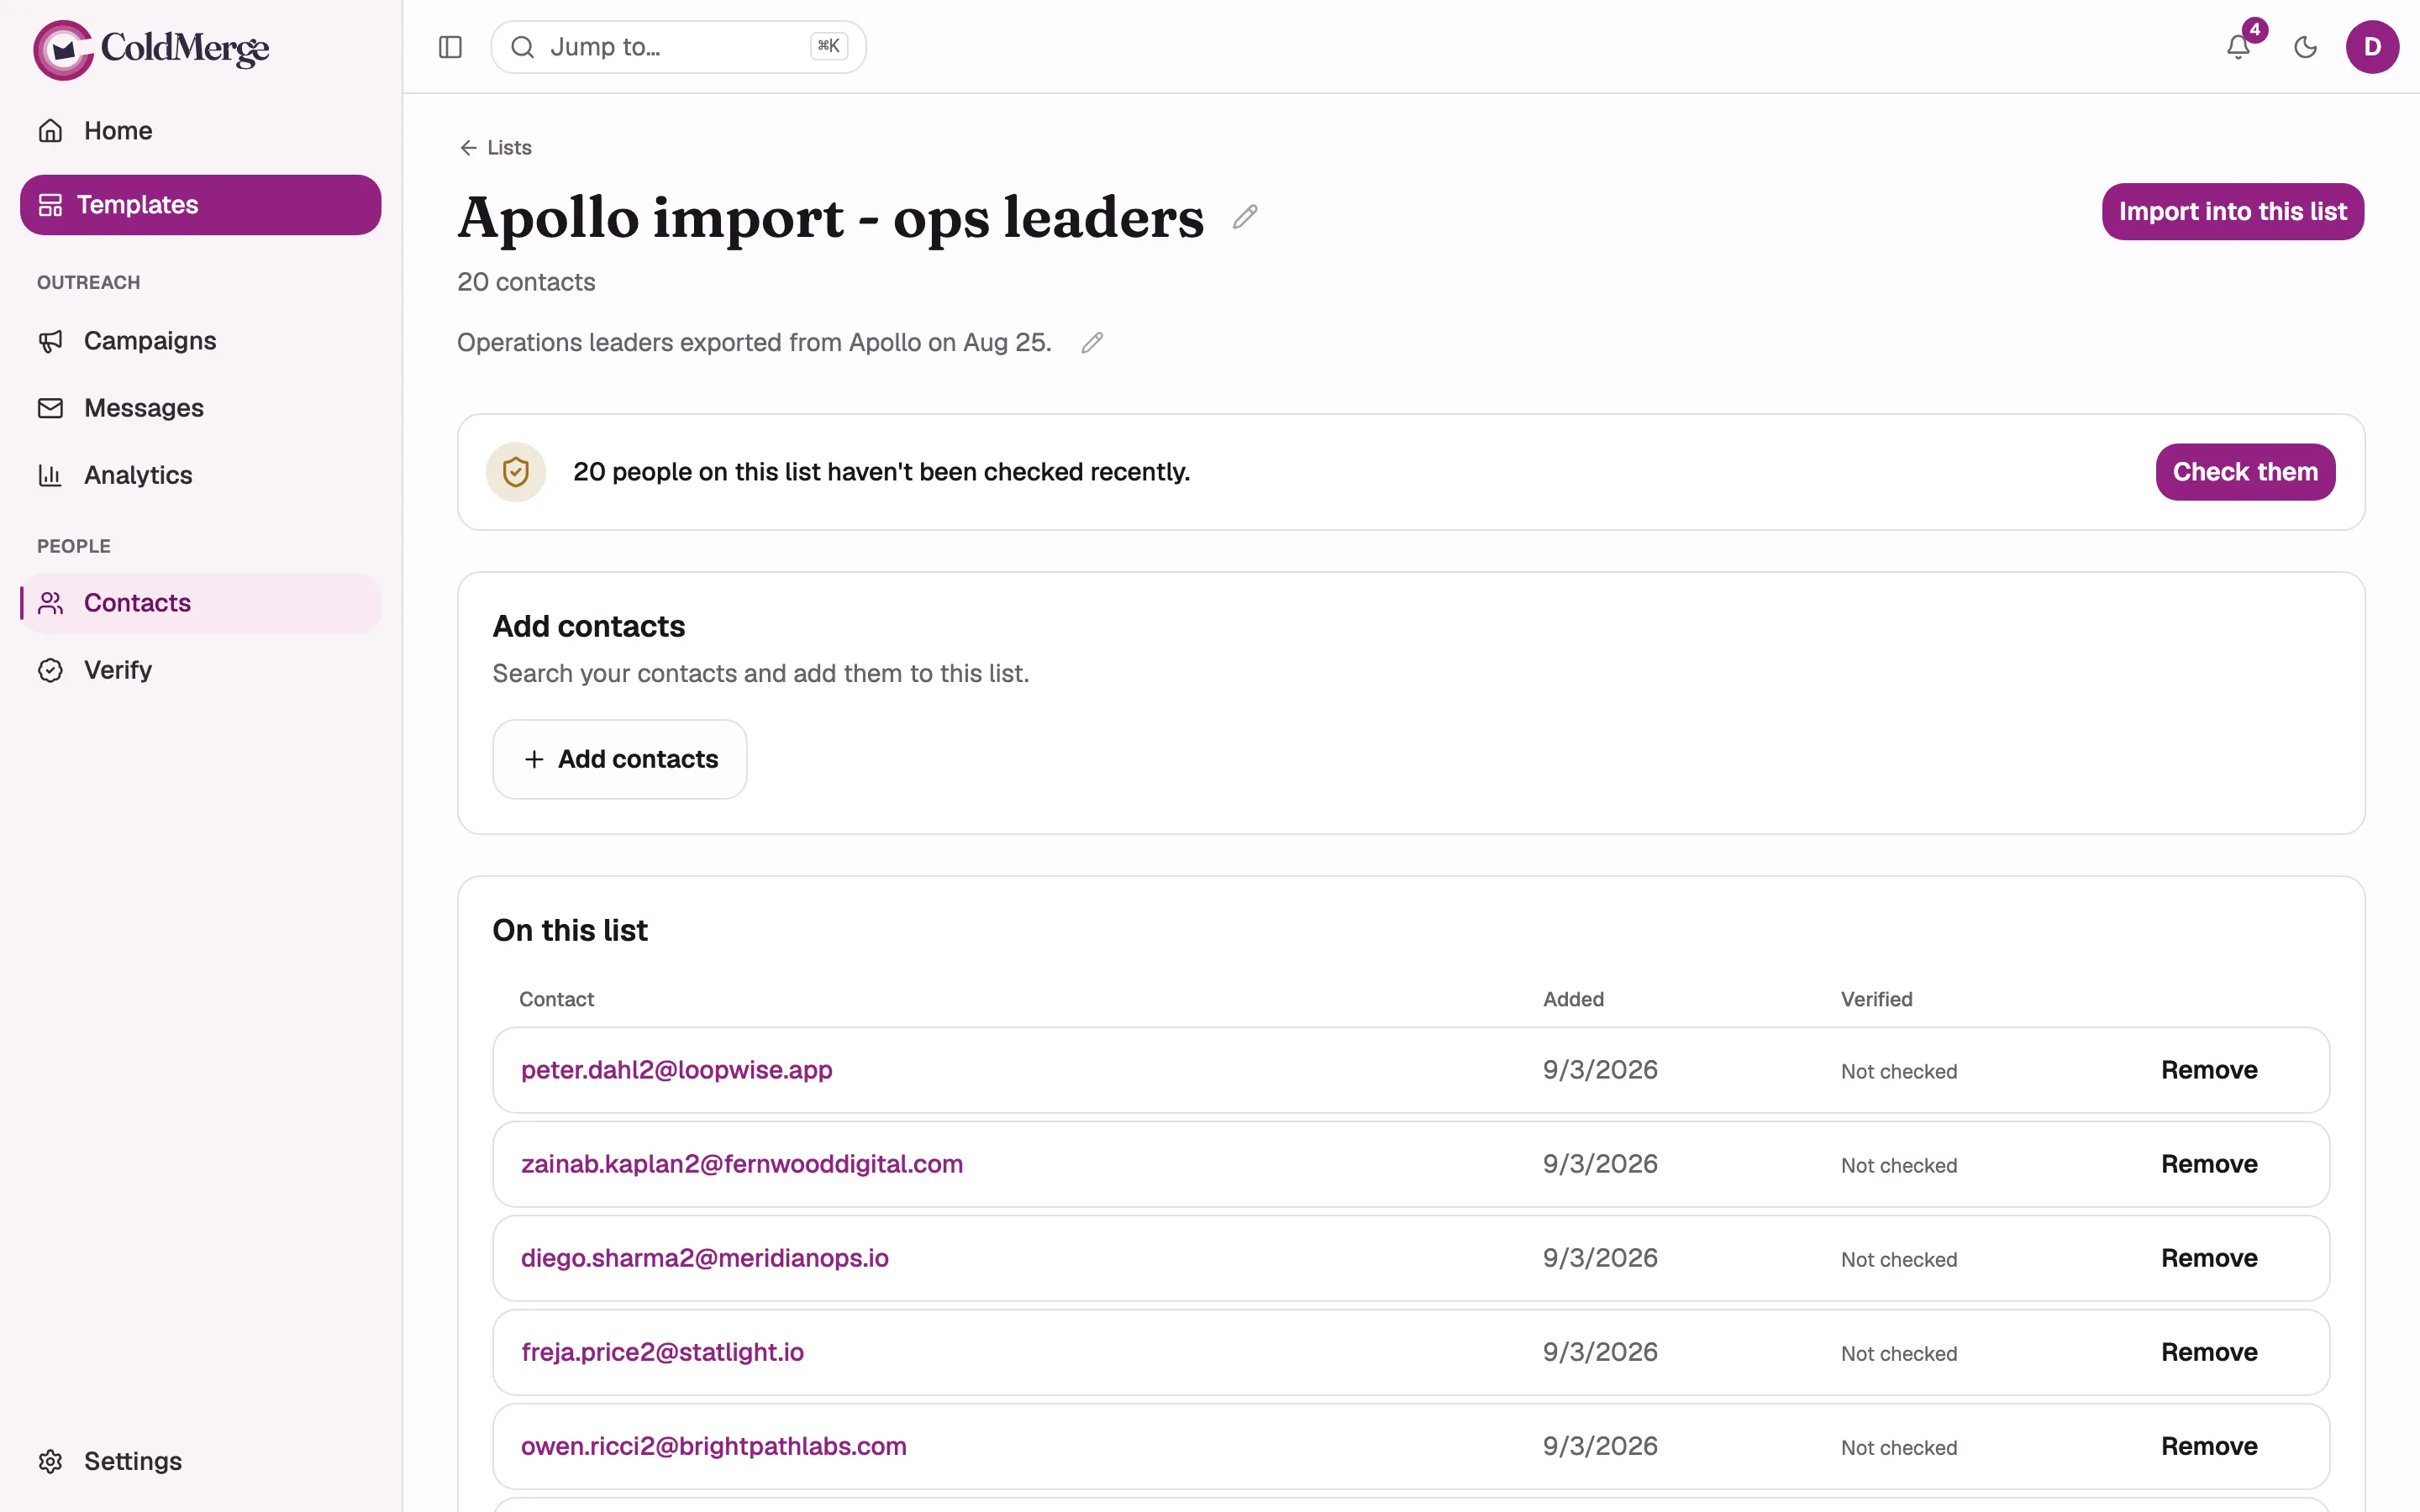
A list in ColdMerge is a fixed set of people, not a saved search. Someone is on it because an import put them there or because you added them.
Step 5: Write the campaign
Section titled “Step 5: Write the campaign”- Open Campaigns and choose New campaign. You land straight in the editor. Nothing is saved yet.
- In From, pick the mailbox you connected in step 1.
- In To, pick the list you made in step 4.
- Write your Subject.
- Write the body. To personalise it, type a merge field like
{{firstName}}. Give it a fallback with a pipe, so{{firstName | there}}writes “there” for anyone whose first name you do not have. Without a fallback, a missing value will hold that person’s message back. - Name the campaign by editing the title at the top of the page.
- Check the Sending window. Out of the box it is 09:00 to 17:00, Monday to Friday, in the timezone the campaign carries. Leave it alone for your first run.
- Choose Save.
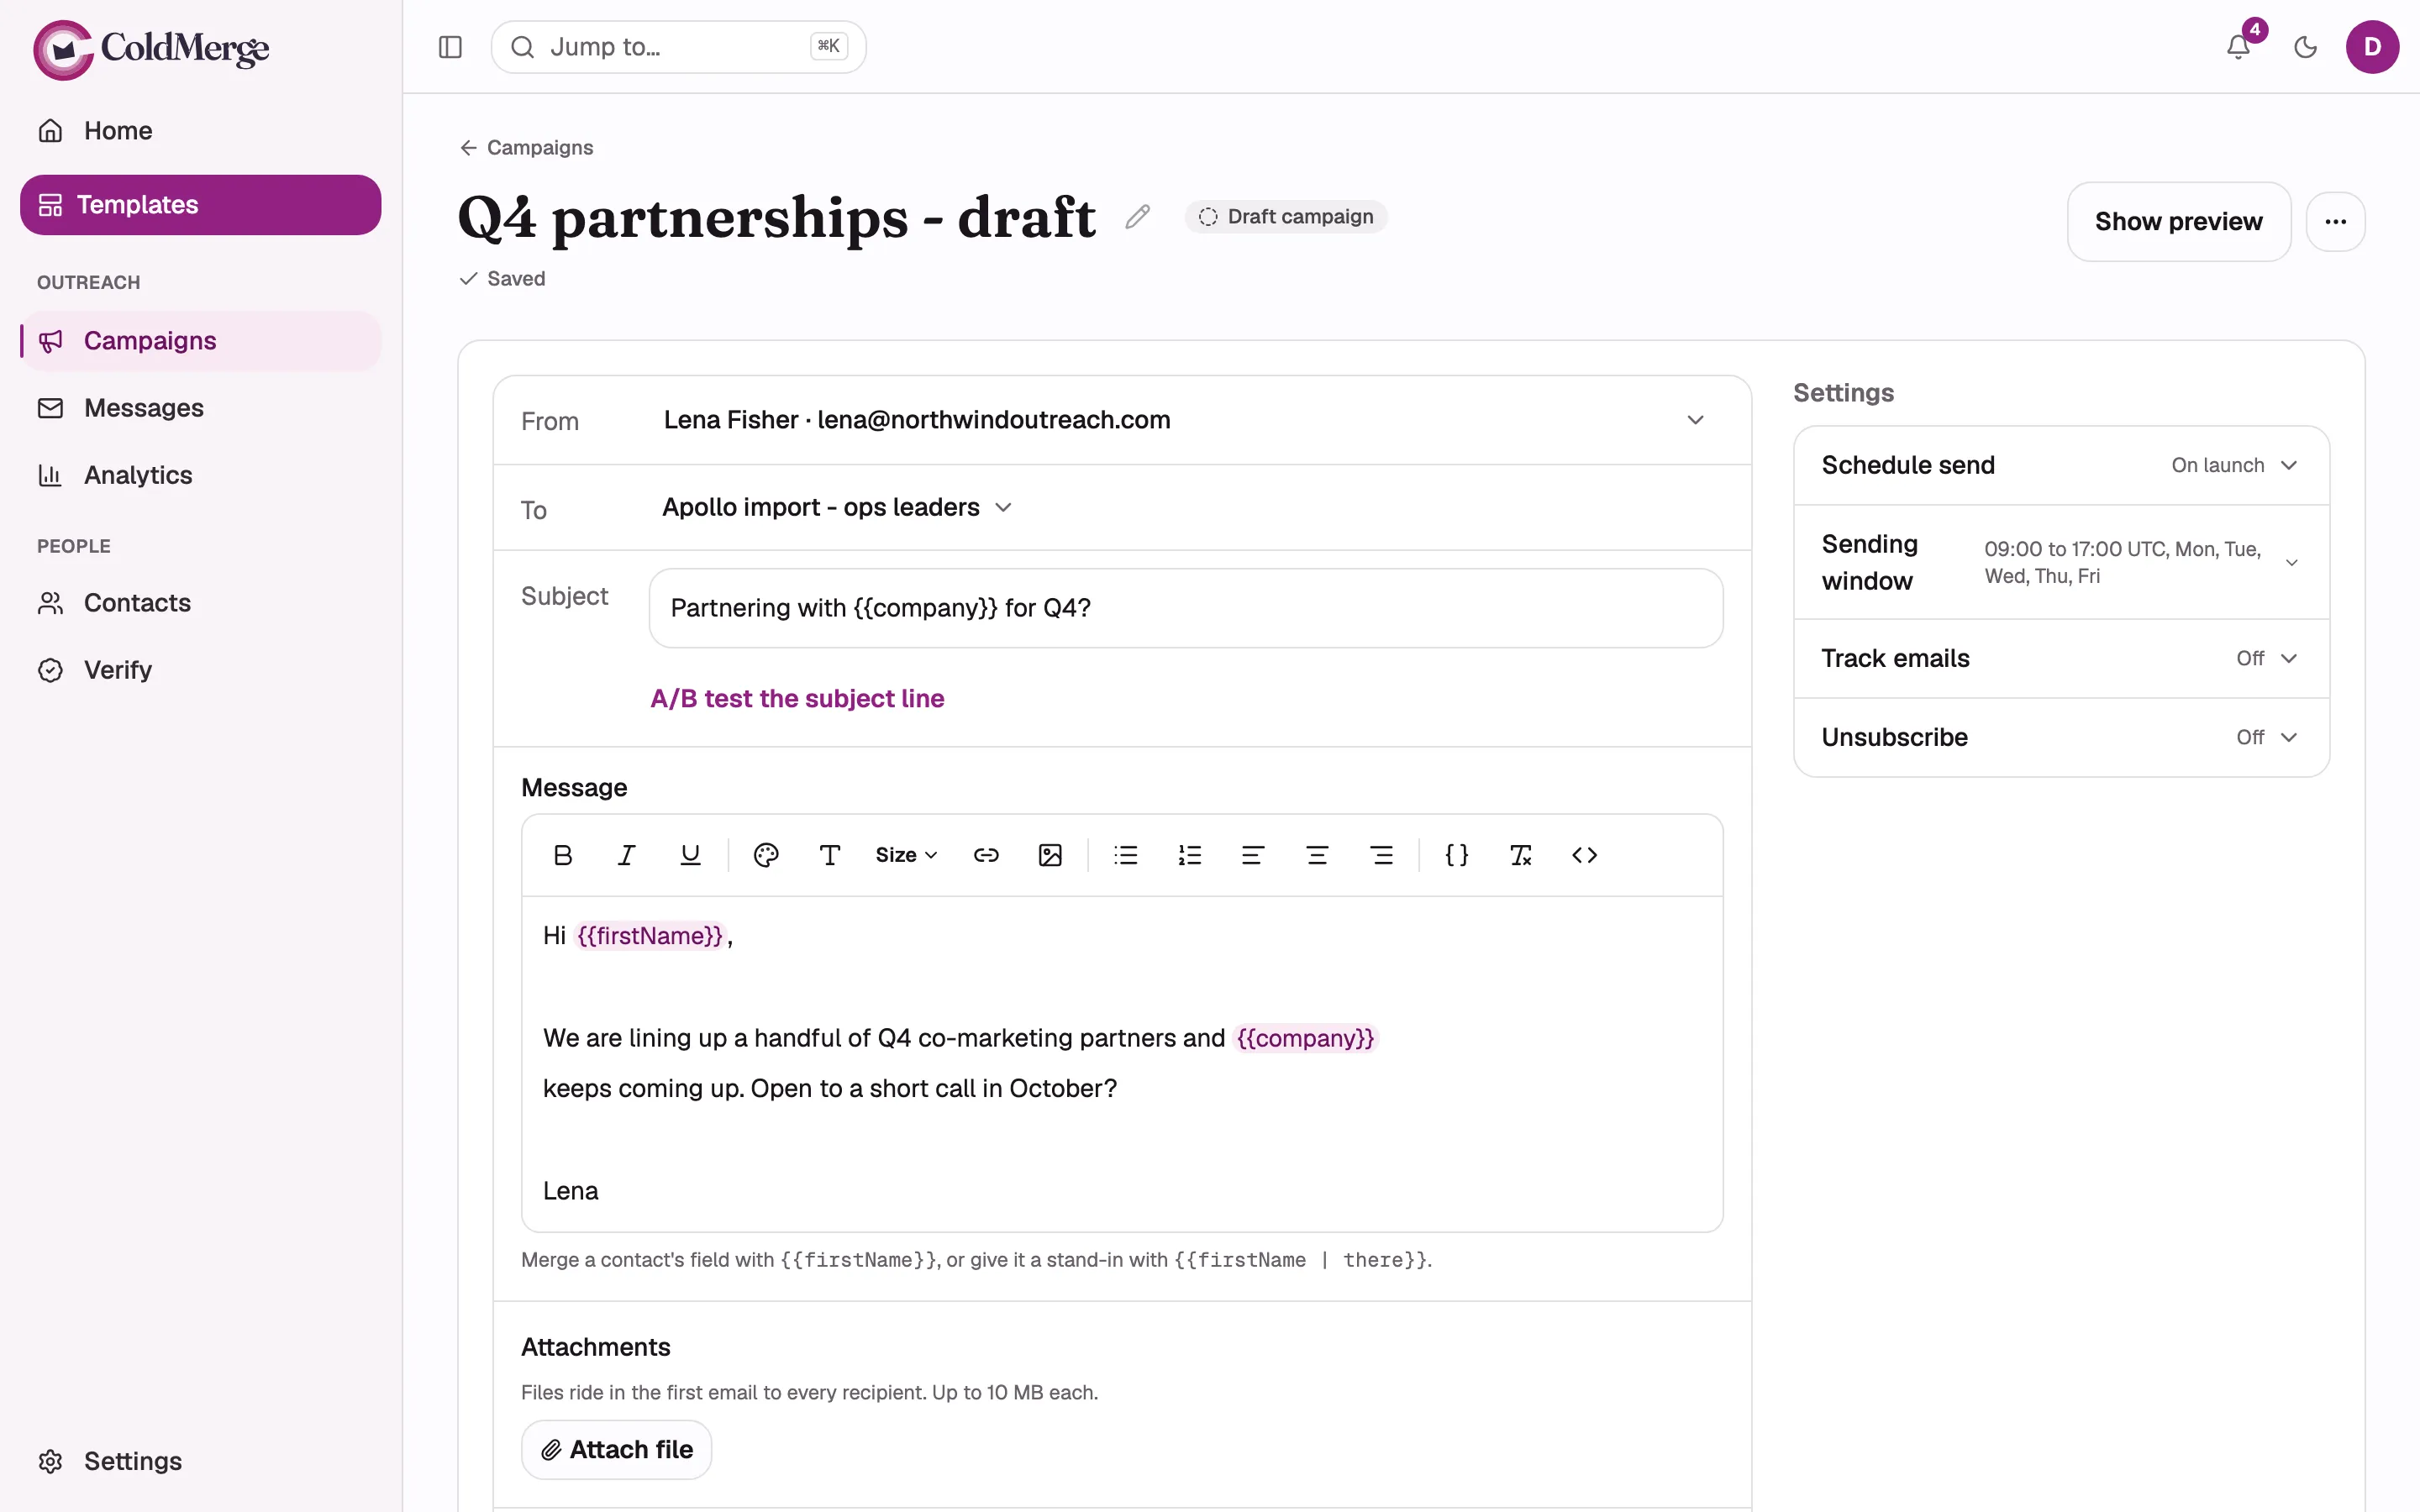
You do not pick between plain text and HTML. If you leave the body unformatted it goes out as plain text, and it becomes HTML the moment you add formatting or turn on tracking. There is more on that in Campaigns & sequences.
Follow-up steps live under the message and are optional. Skip them for now. Your first campaign is easier to read with one email in it.
Step 6: Send yourself a preview
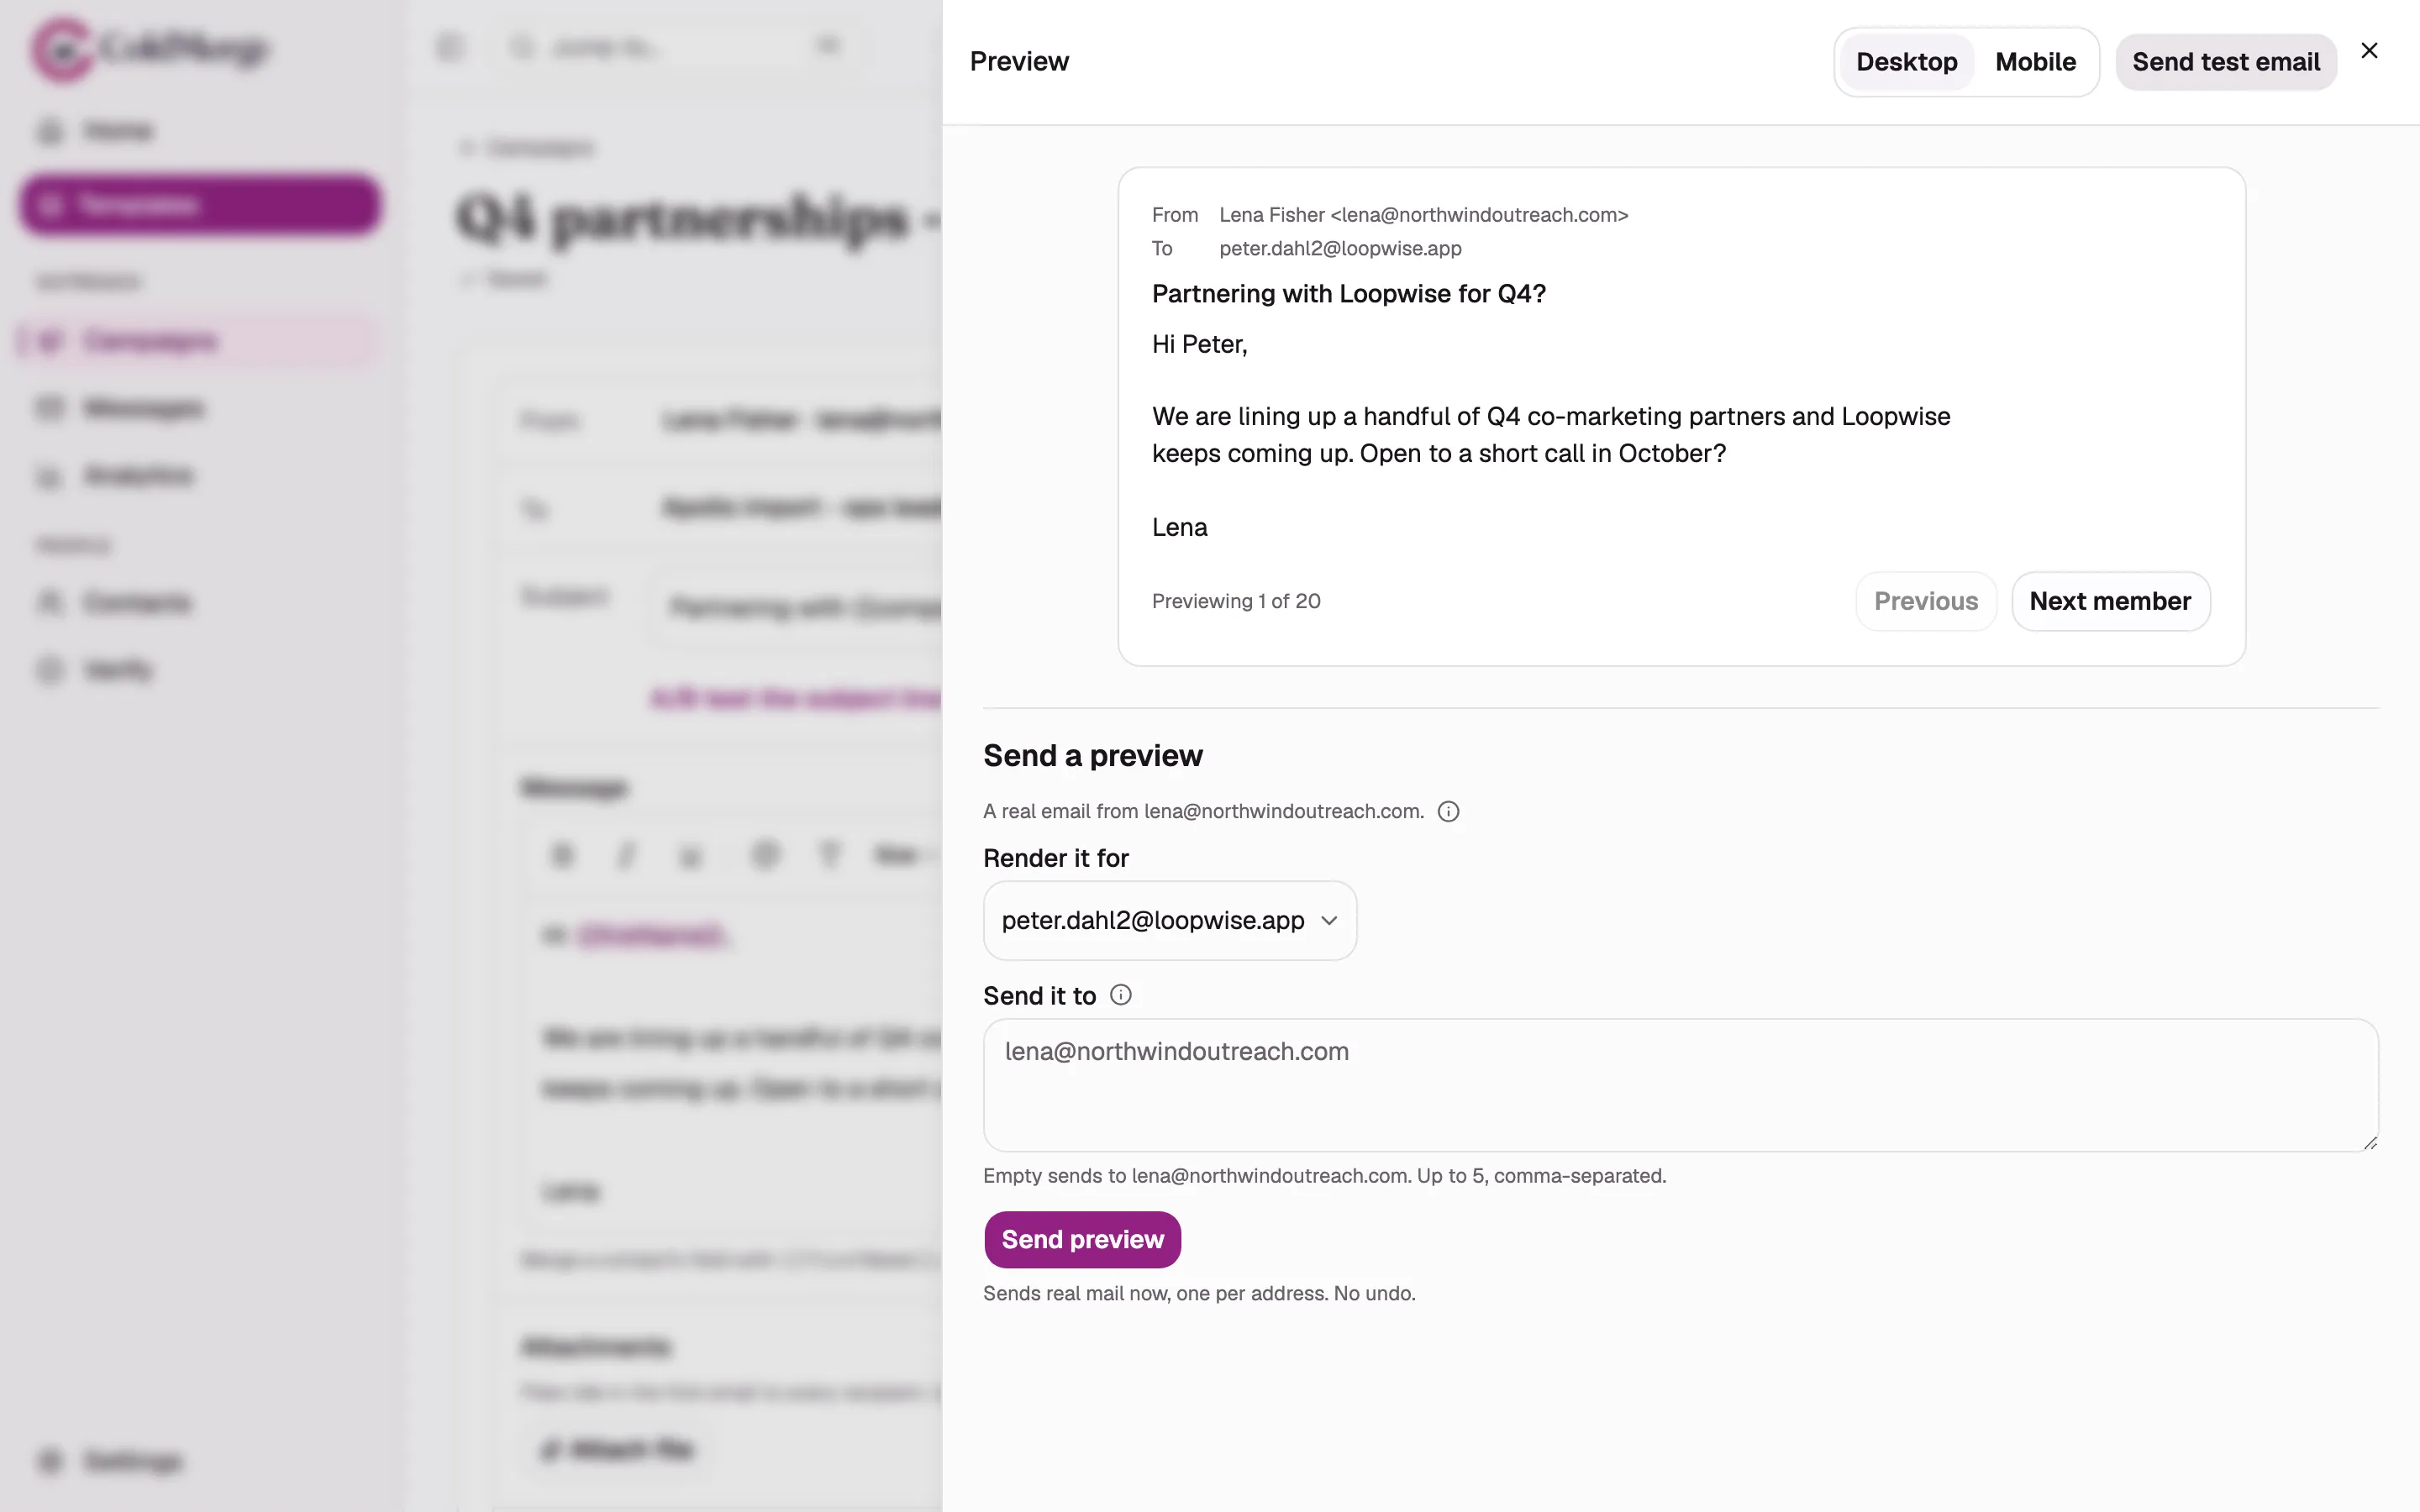
Section titled “Step 6: Send yourself a preview”The preview panel sits below the editor once the campaign is saved and has a list.
- In Render it for, pick one real contact from your list. The preview is rendered with that person’s actual field values, so you see what a merge field really produces.
- In Send it to, type your own address. You can add a few addresses, separated by commas, up to five in one preview.
- Send it, and open the message in your inbox.
Three things are worth knowing before you press send:
- A preview is a real message from your real mailbox, so it uses your sending allowance just like a campaign send does.
- Previews are limited to 20 per campaign and 50 across your whole workspace in any rolling 24 hours.
- The preview sends the last saved version of your message. If you have edited since saving, save first.
Afterwards, the receipt tells you three separate things: which addresses it reached, which it did not, and which merge fields came out empty. That last one is your cue to add a fallback before you launch.
Step 7: Review, then start
Section titled “Step 7: Review, then start”- Choose Continue to review. The campaign moves out of draft into a three-step review: Check, Audience, Review.
- Check your list. If ColdMerge can check addresses for you, it offers to here and shows you the cost first. This is a suggestion, never a gate. You can launch without it.
- Who this goes to. This is where ColdMerge tells you about the awkward cases and lets you decide each one: people missing a value your merge fields need, people already queued in another live campaign, and addresses a check said were dead. Each has plain choices, such as adding a fallback, skipping those contacts, or sending anyway.
- Review and start. The top of this step shows one big number: how many people will be emailed. Below it is a recap of the sender, the list, the subject, and the message, and then the recipients themselves. Read it. Nothing has sent yet, and the page says so.
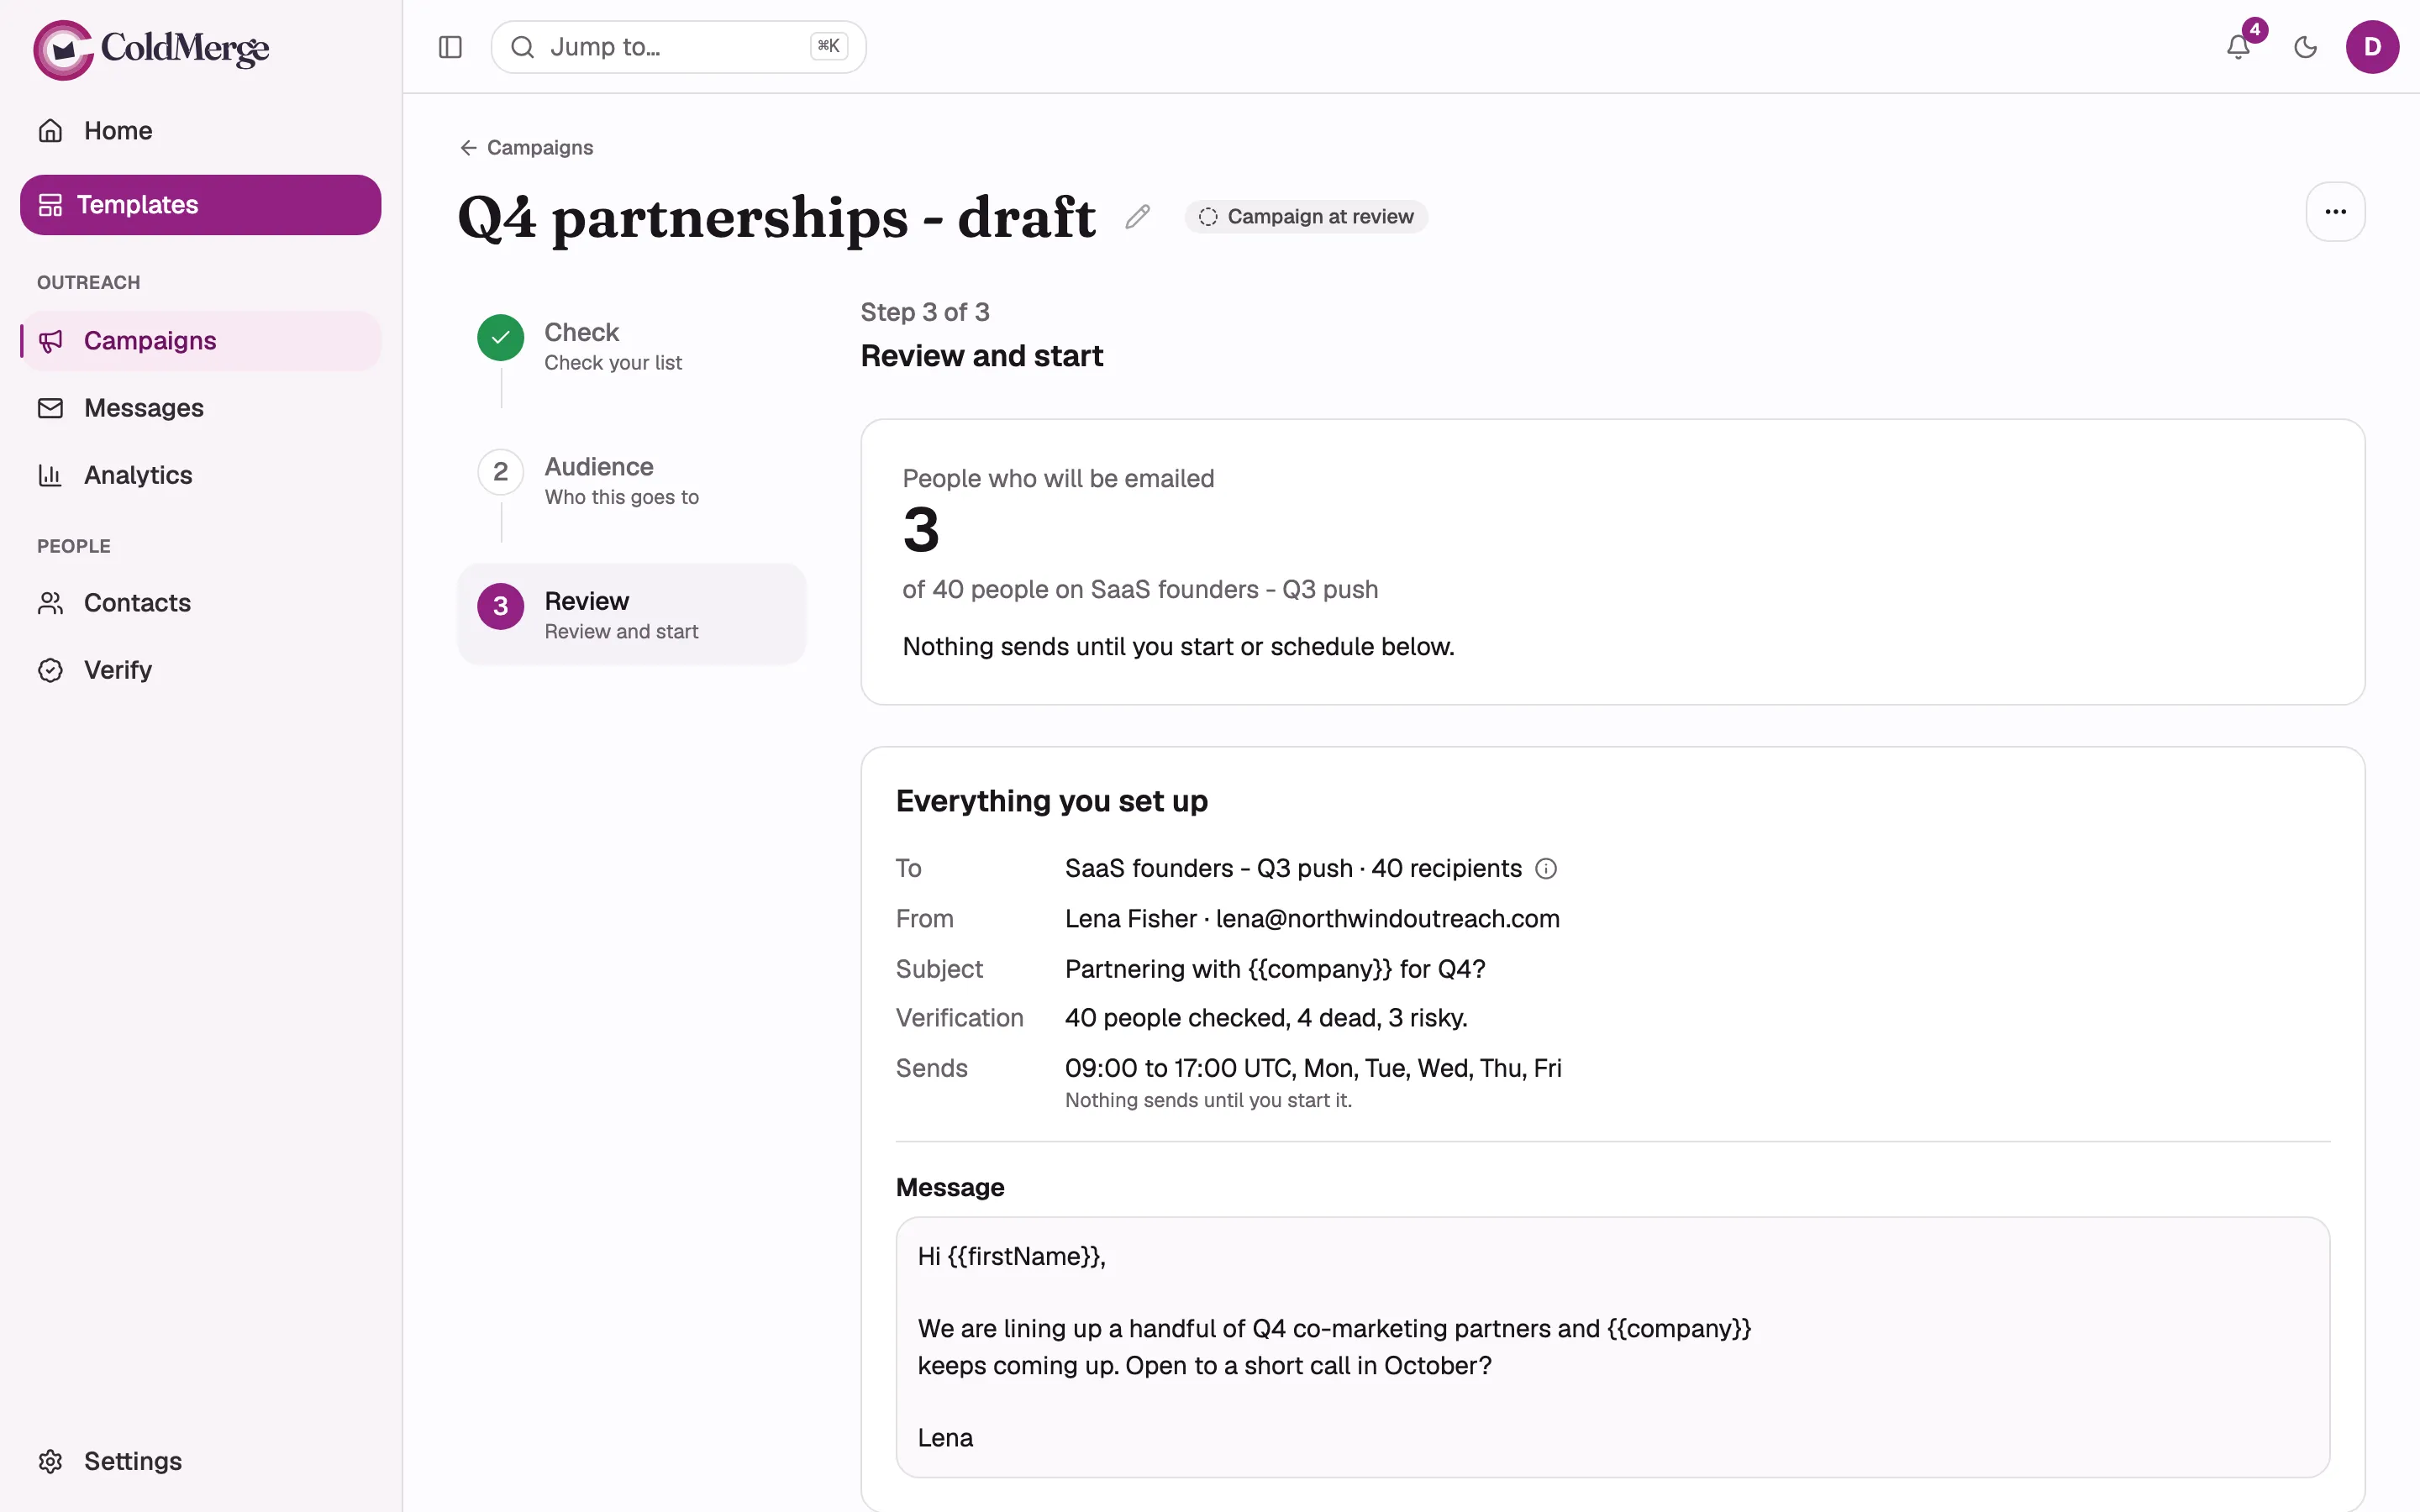
When you are happy:
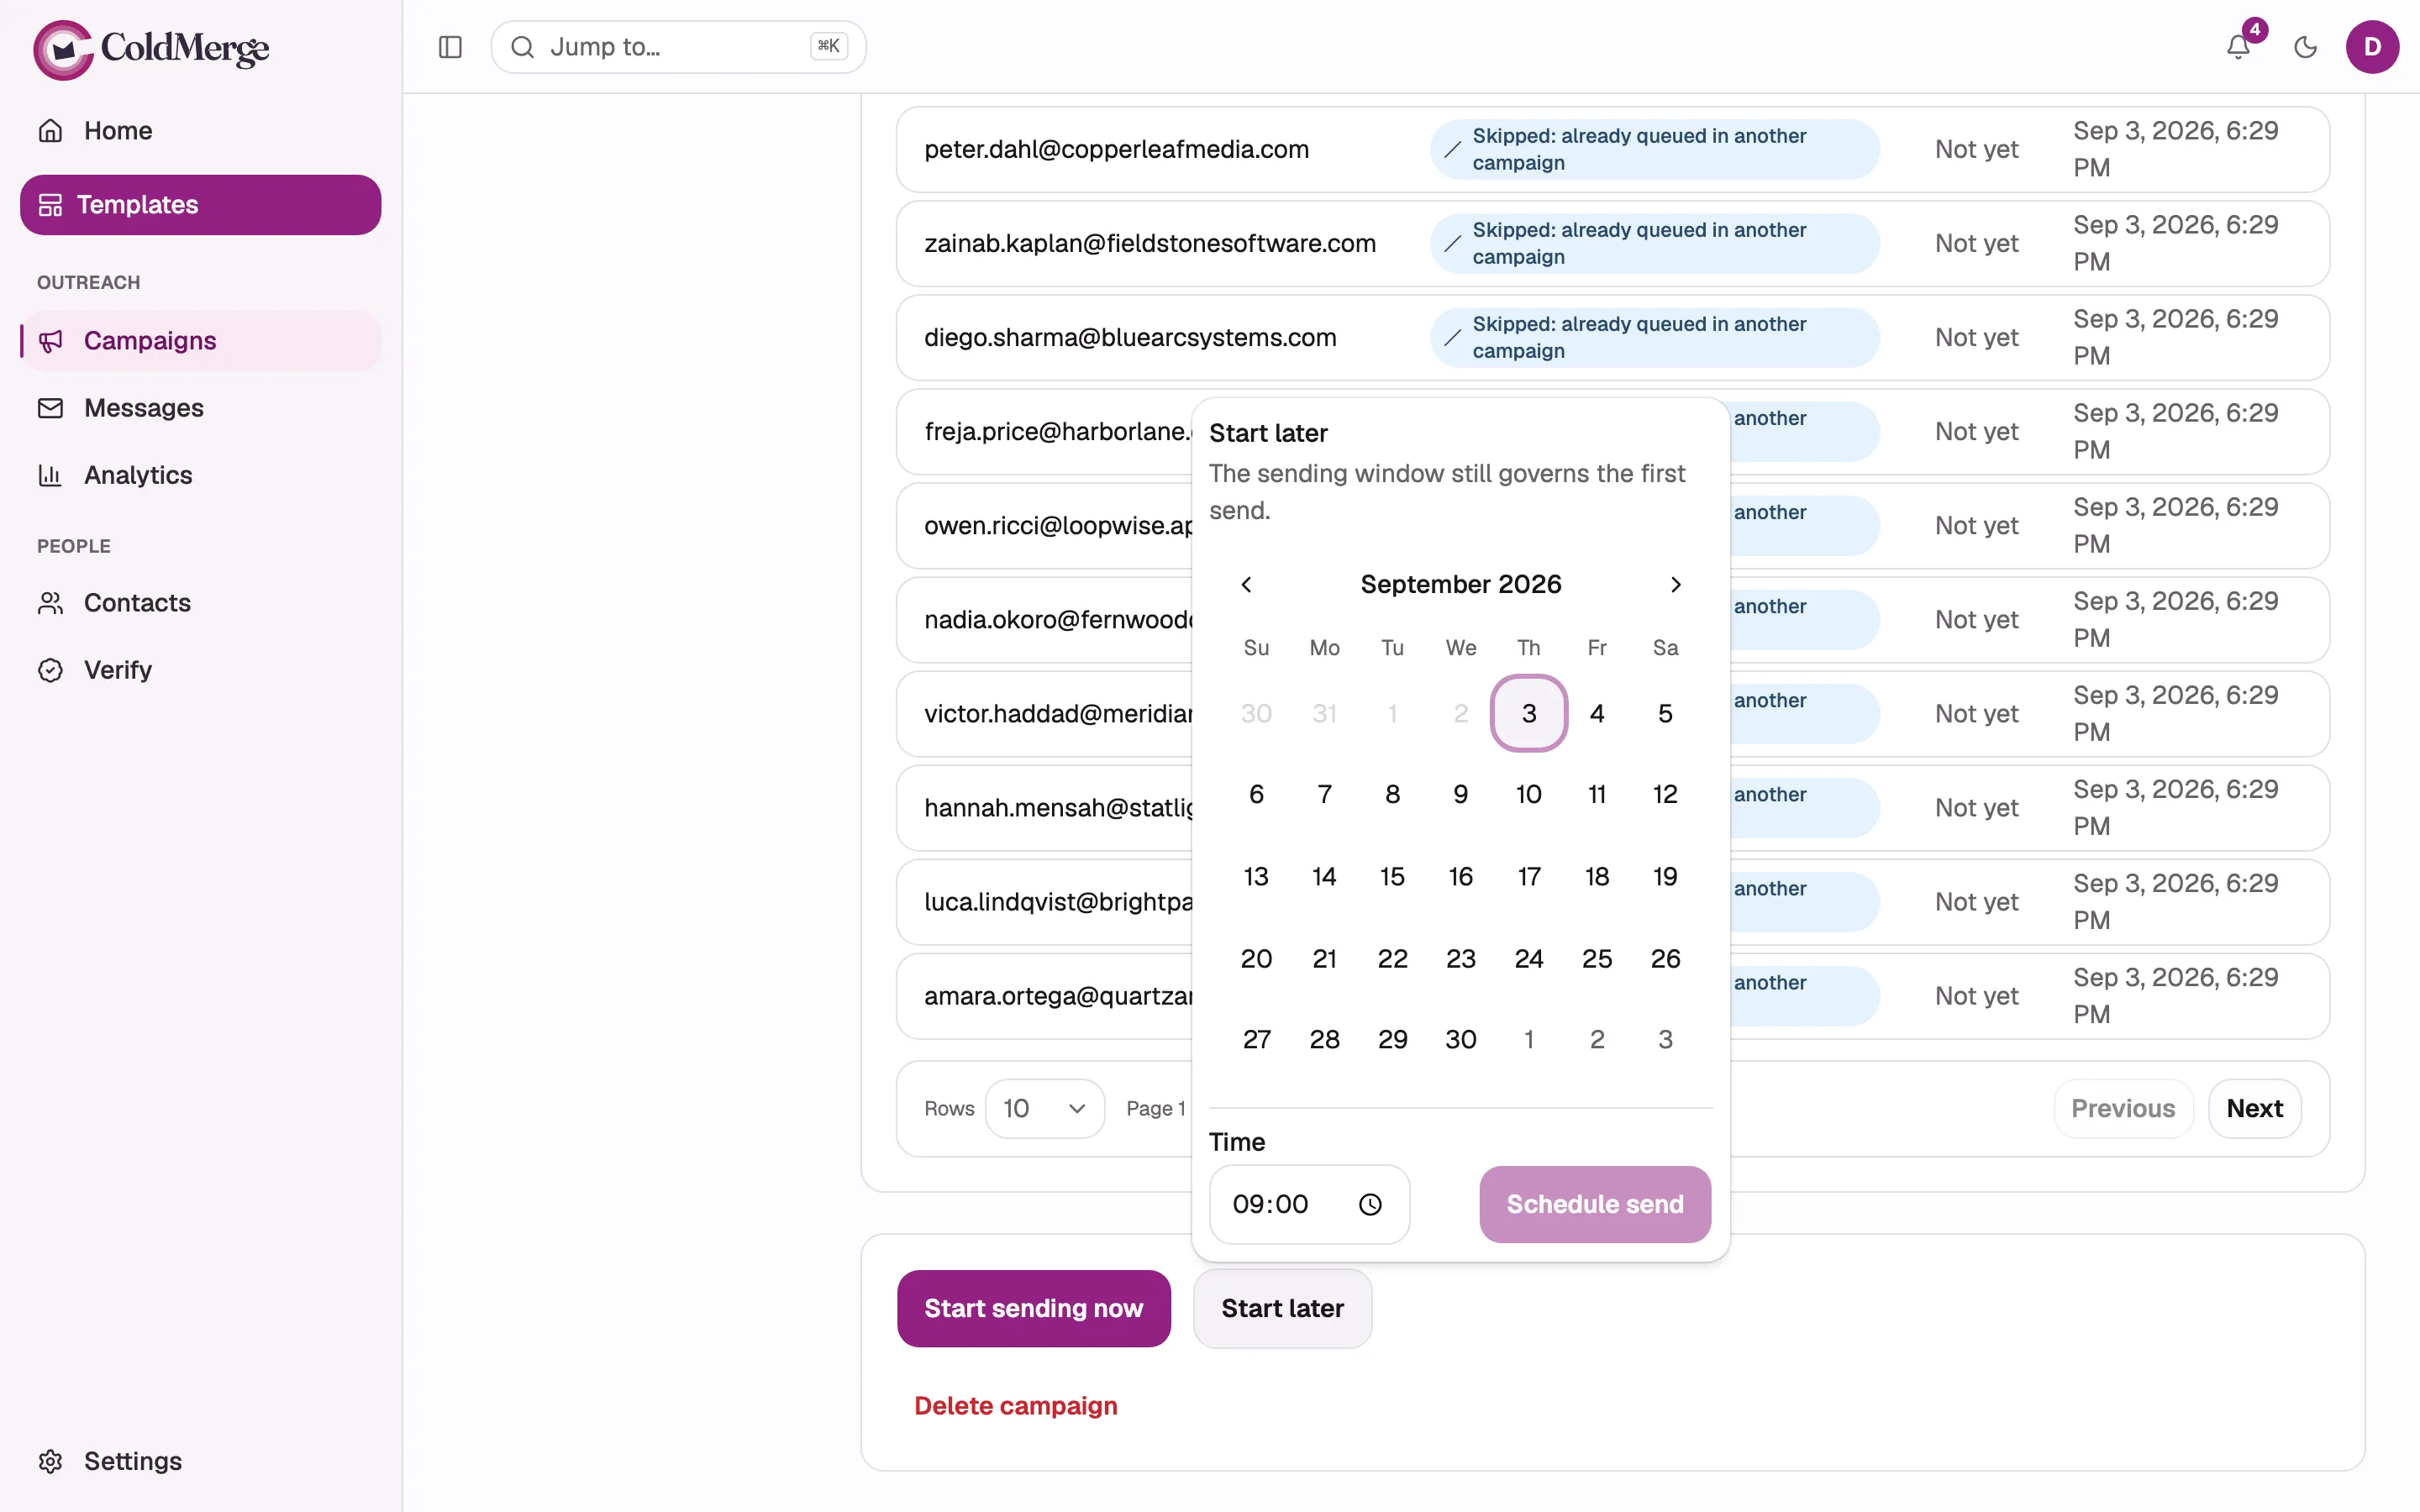
- Choose Start sending now to begin. The first message goes out at the next moment inside your sending window.
- Or choose Start later, pick a date and time, and confirm with Schedule send. A scheduled time is a “not before” floor, not an override. If you pick Saturday and your window is Monday to Friday, the first send lands on Monday. ColdMerge shows you the resolved first-send time so there is no guessing.
If you would rather not send at all, you can still delete the campaign at this point. That option disappears once it starts sending.
Step 8: Watch it go
Section titled “Step 8: Watch it go”The campaign page becomes a monitoring view. This part works on a phone.
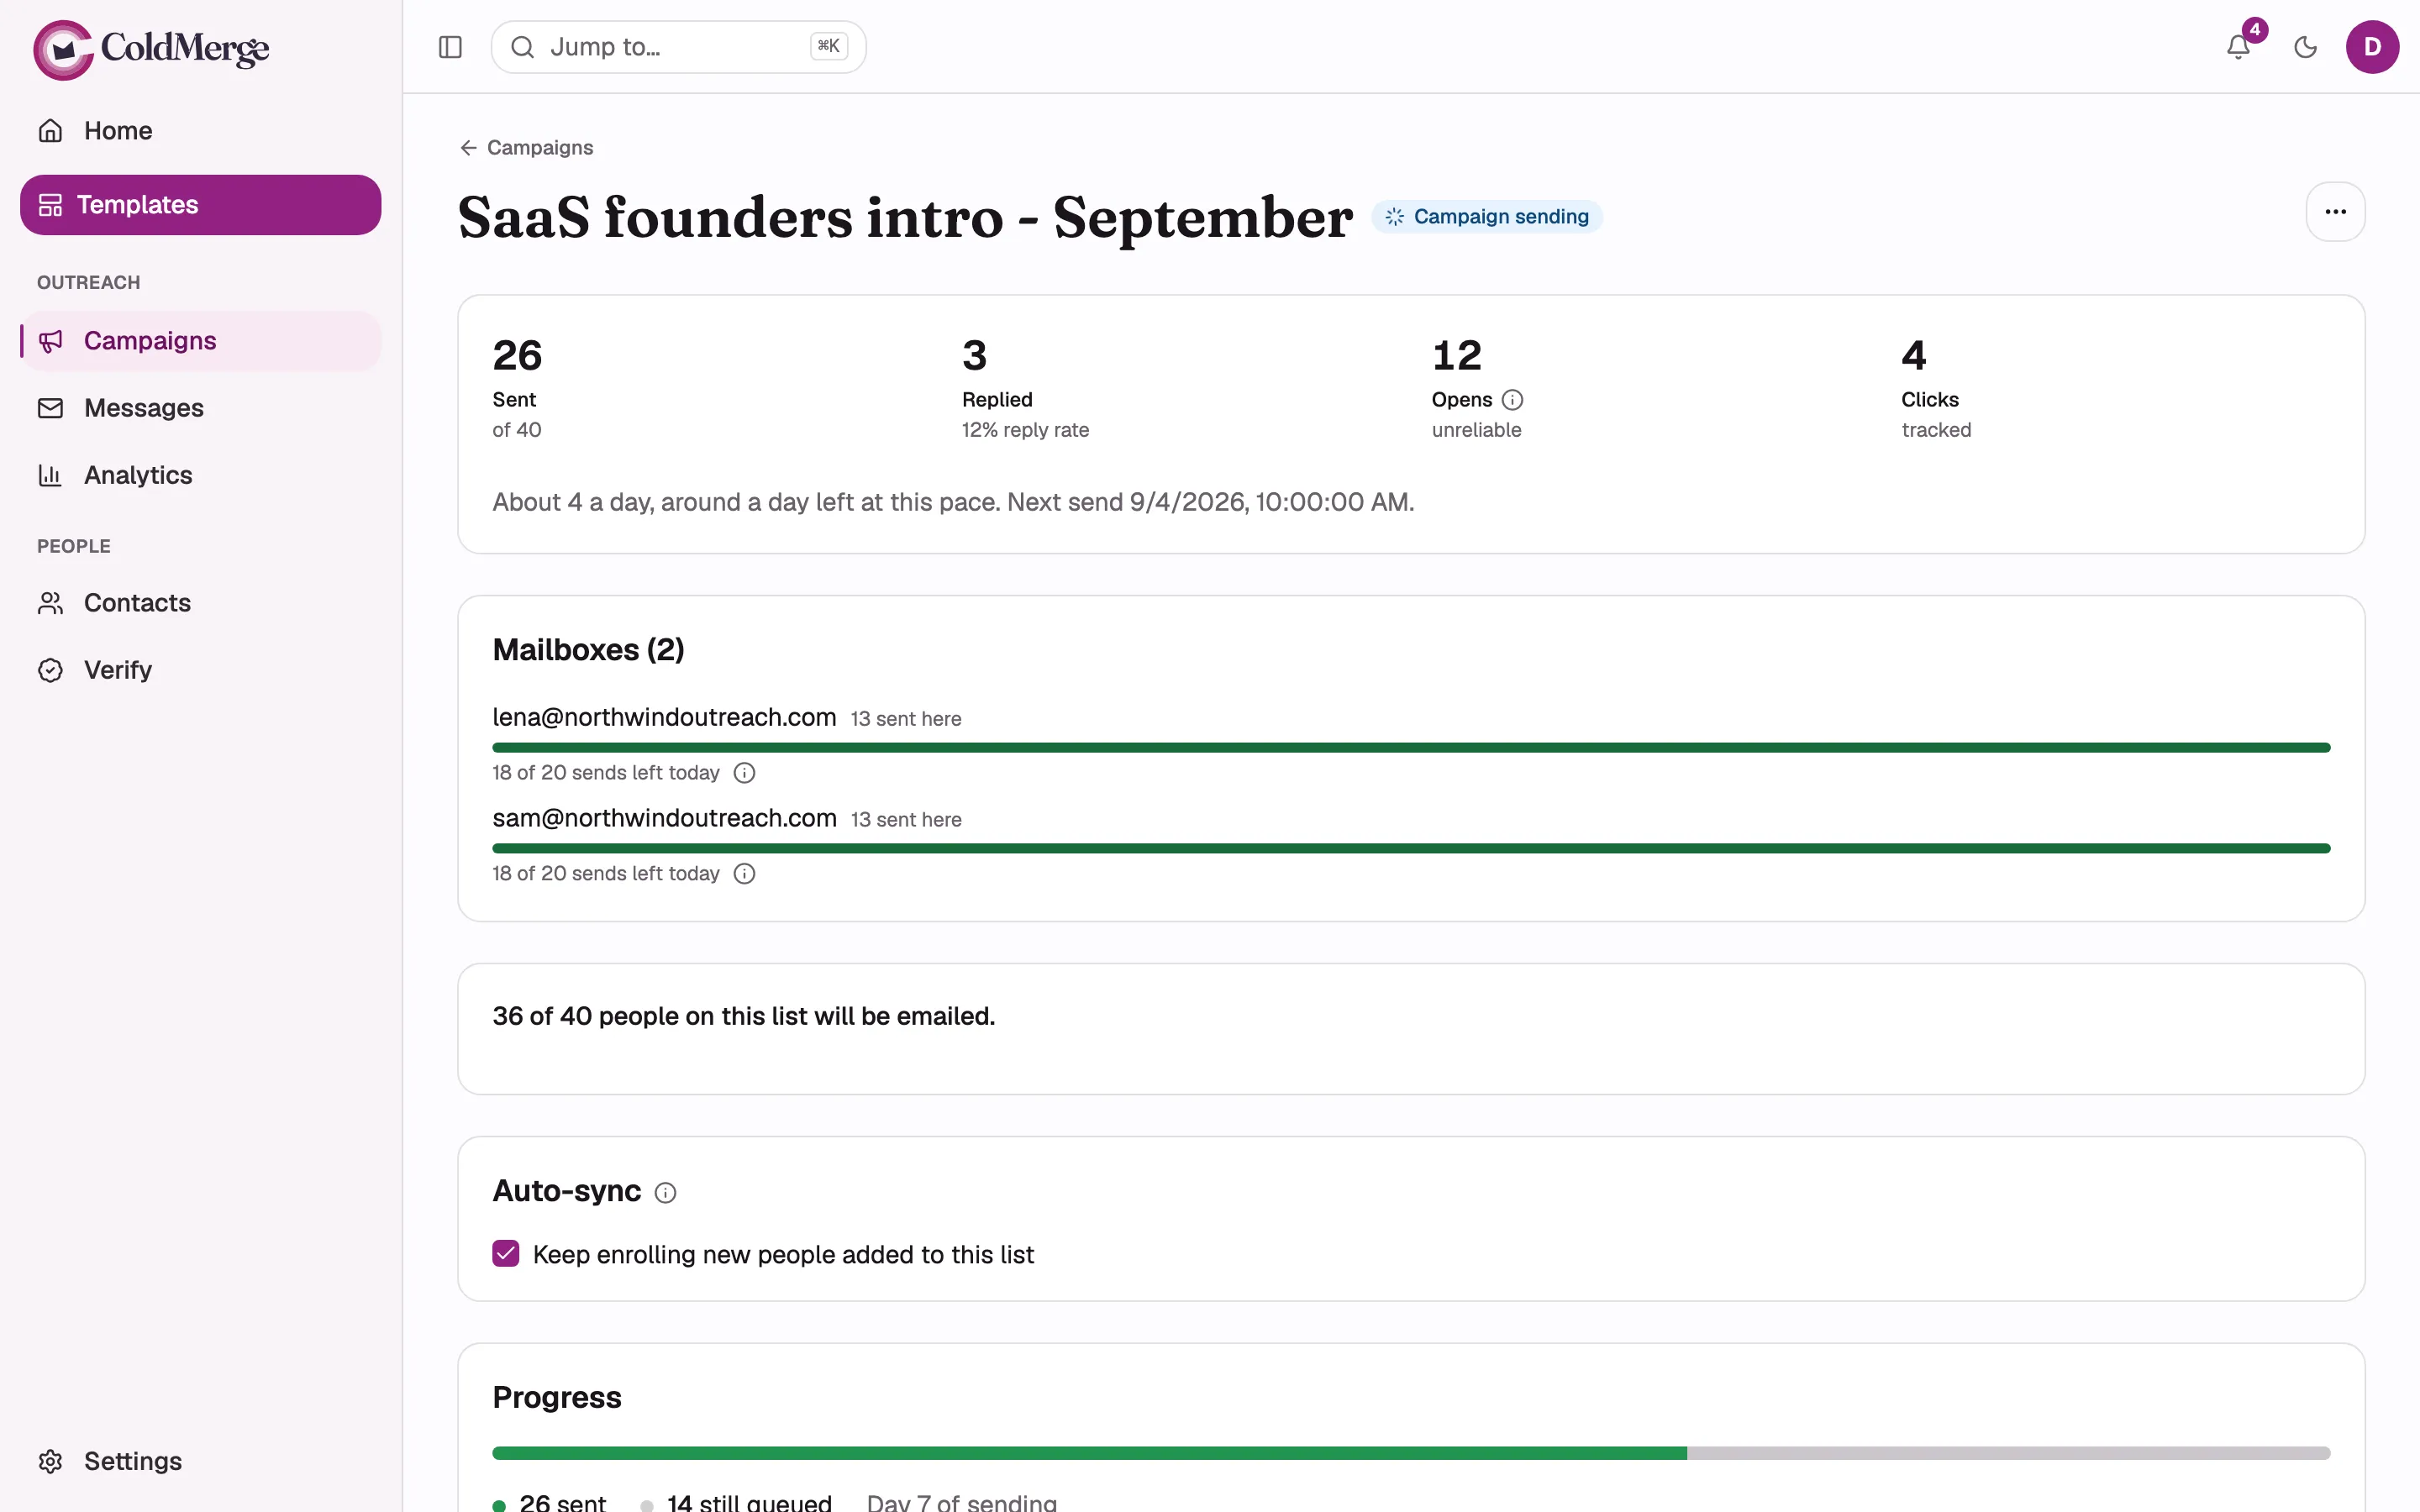
- A banner at the top tells you the state: scheduled and when it resolves to, sending, paused, or cancelled.
- A row of big numbers shows sent, replied and the reply rate, and, if you turned tracking on, opens and clicks. Beside them is a pace estimate, along the lines of “about N a day”.
- The recipients table below can be filtered to sent, sending, queued, failed, skipped or cancelled. A skipped row is not an error. It means a rule you chose did its job.
Two things will look odd on a first run and are both normal:
- It sends slowly. ColdMerge spaces messages out across your window with random gaps instead of firing them in a burst, because a burst is a spam signal.
- A new mailbox sends very little at first. A mailbox in its first three days is allowed 20 sends a day, and the allowance climbs from there over the following weeks. A campaign too big to finish today simply carries on tomorrow. This is progress, not a failure.
What you learned
Section titled “What you learned”You have a connected mailbox, a list, a campaign that has really sent, and a place to watch it. From here:
- Add follow-up steps that stop when someone replies, in Campaigns & sequences.
- Understand your daily allowance and your sending window in Deliverability.
- Get your domain fully clean in Mailboxes & sending domains.
- Read what came back in Replies, tracking & verification.