Find, add, and act on contacts
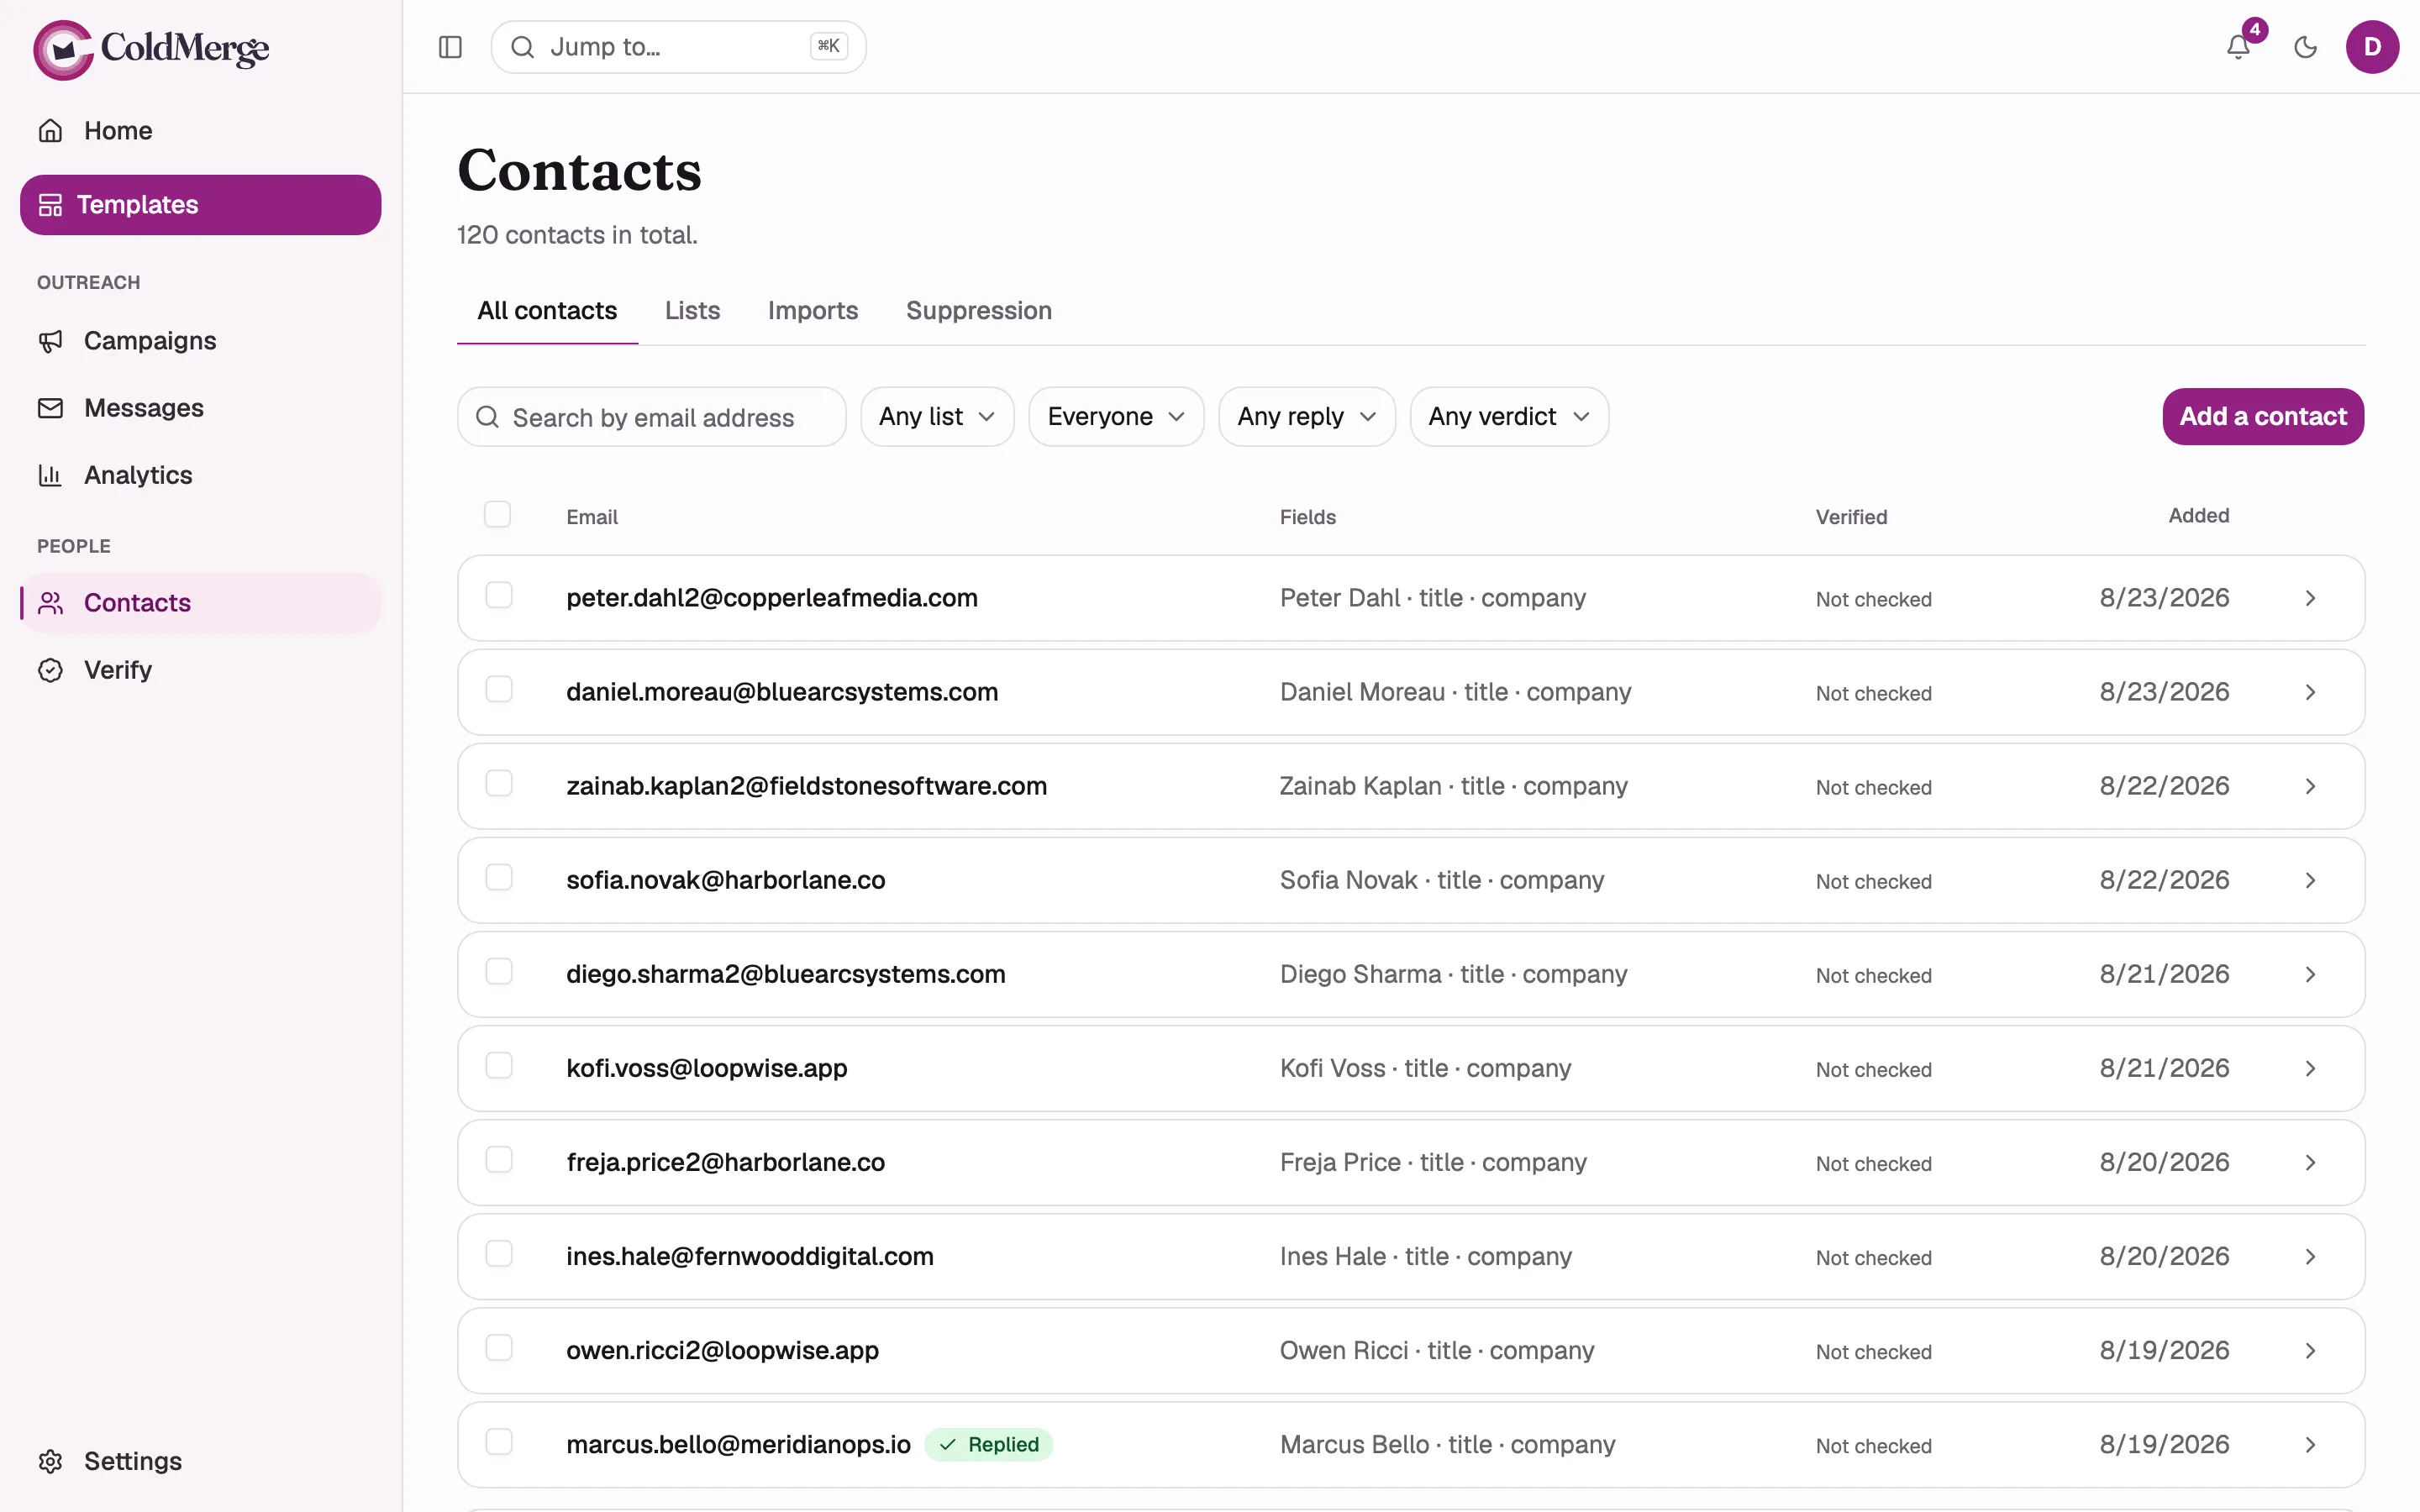
Everyone in your workspace is on one screen: Contacts, then the All contacts tab. This page covers finding people there and acting on them.
Search for someone
Section titled “Search for someone”Type into the Search by email address box. The search matches any part of an
address, so acme finds [email protected] and [email protected]. Capital
letters do not matter.
The search runs a moment after you stop typing, so you do not need to press anything.
Narrow the table with filters
Section titled “Narrow the table with filters”Four dropdowns sit next to the search box. Each one starts on its “everything” option.
| Filter | Options | What it does |
|---|---|---|
| List | Any list, then each of your lists | Shows only people on the list you pick |
| Suppressed | Everyone, Can be emailed, Suppressed | Splits people you can still email from people you can never email again |
| Replied | Any reply, Replied, No reply | Shows only people who have written back, or only people who have not |
| Verification verdict | Any verdict, Valid, Risky, Invalid, Unverified | Shows only addresses with that result, counting only results that are still fresh |
Unverified is not a verdict. It selects every address with no usable answer: never checked, No-answer, and any result that has gone stale, which takes about three months. For the same reason Valid, Risky, and Invalid match only fresh results, so an address checked a year ago reads as unverified until it is checked again. Valid and Invalid here are the same verdicts as the Alive and Dead badges below.
The search box and the list, replied, and verdict filters are recorded in the page address, so a filtered view can be bookmarked or sent to a colleague. The suppressed filter is not.
You can sort by Email or by the date a contact was Added. Select the column heading to sort, and select it again to reverse the order.
The badges on a row
Section titled “The badges on a row”- Replied sits next to the address of anyone who has written back to one of your campaigns.
- Suppressed sits next to the address of anyone on your suppression list. Being suppressed is not an error, so the badge is quiet rather than red. See unsubscribes and suppression.
- A verification badge shows the last checking result for the address: Alive, Dead, Risky, or No-answer, with the date it was checked. An address that has never been checked reads Not checked. See replies, tracking and verification.
Add one contact by hand
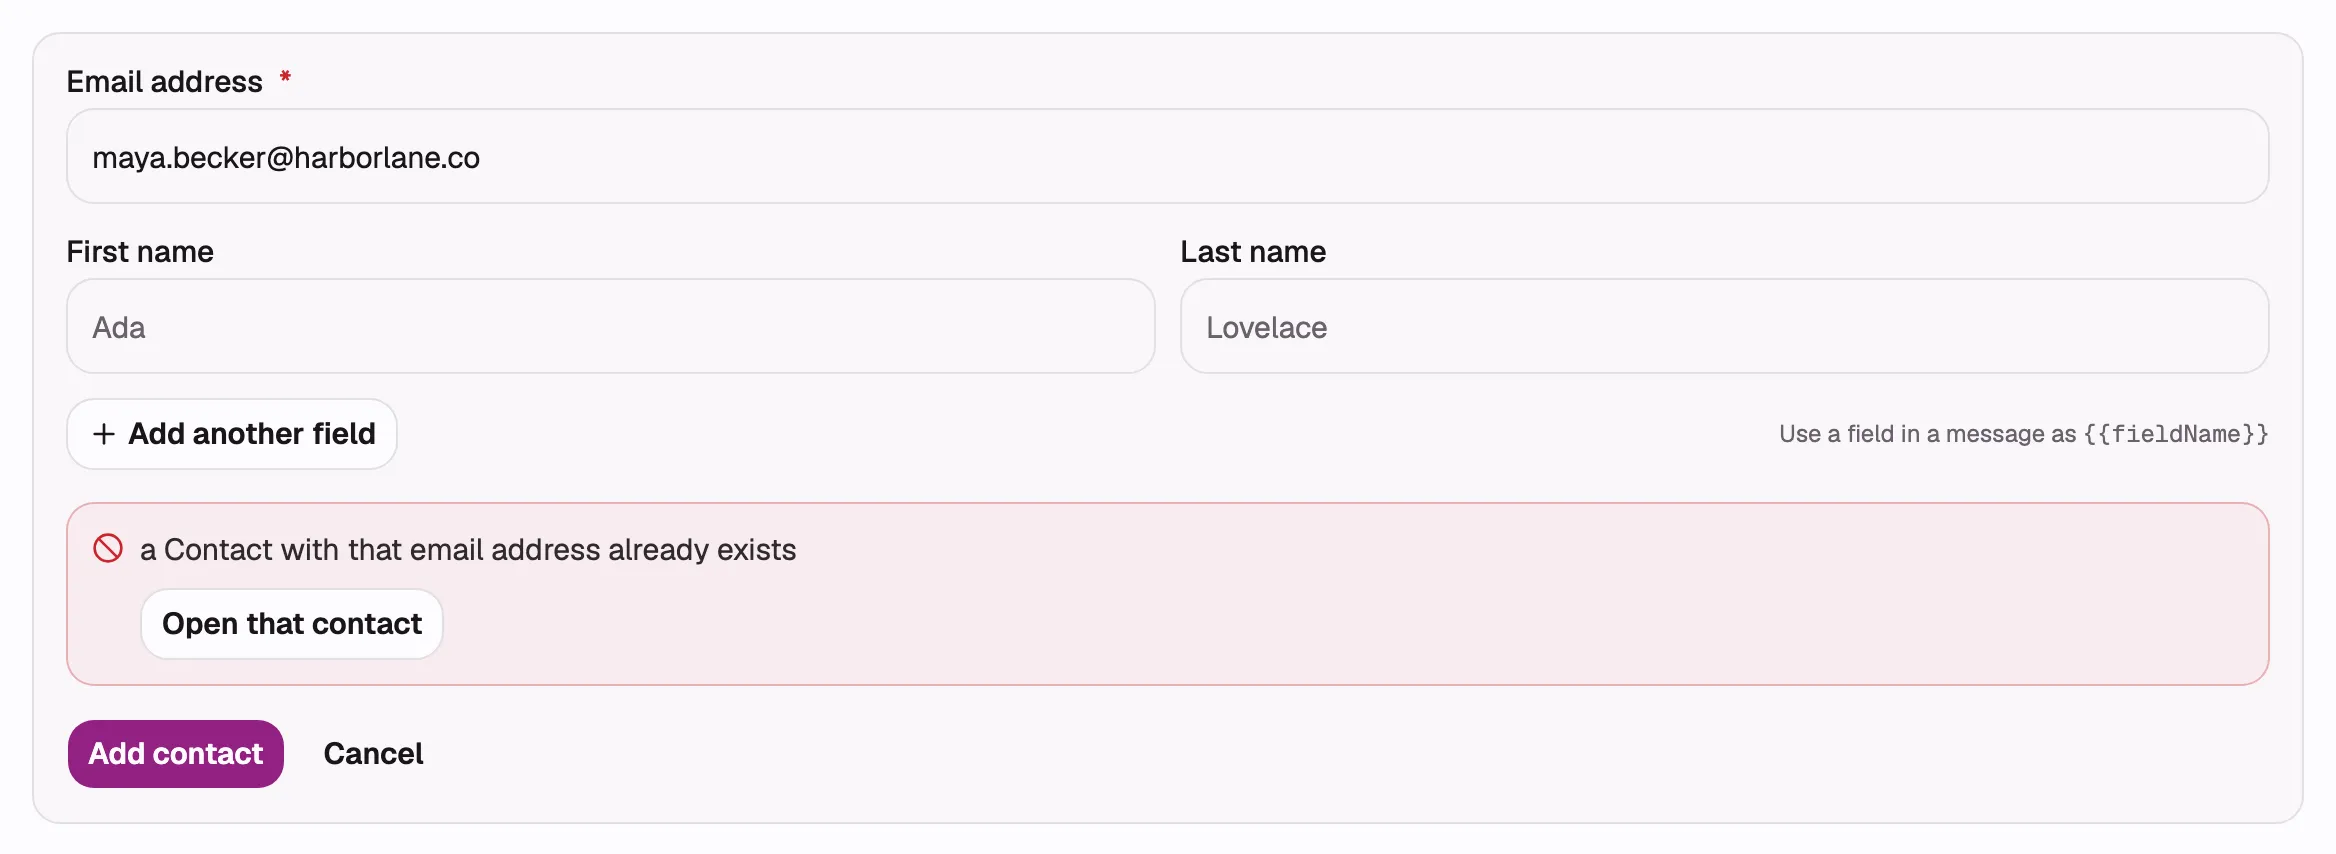
Section titled “Add one contact by hand”- Select Add a contact. A short form opens above the table.
- Type the Email address.
- Fill in First name and Last name if you have them, and select Add another field for anything else you want to merge into a message.
- Select Add contact.
Every field you fill in here is usable in a message as {{fieldName}}. The form
says so under the field rows.
If the address already exists, ColdMerge refuses to make a second copy and offers an Open that contact button instead, so you land on the person you were about to create.
Act on several people at once
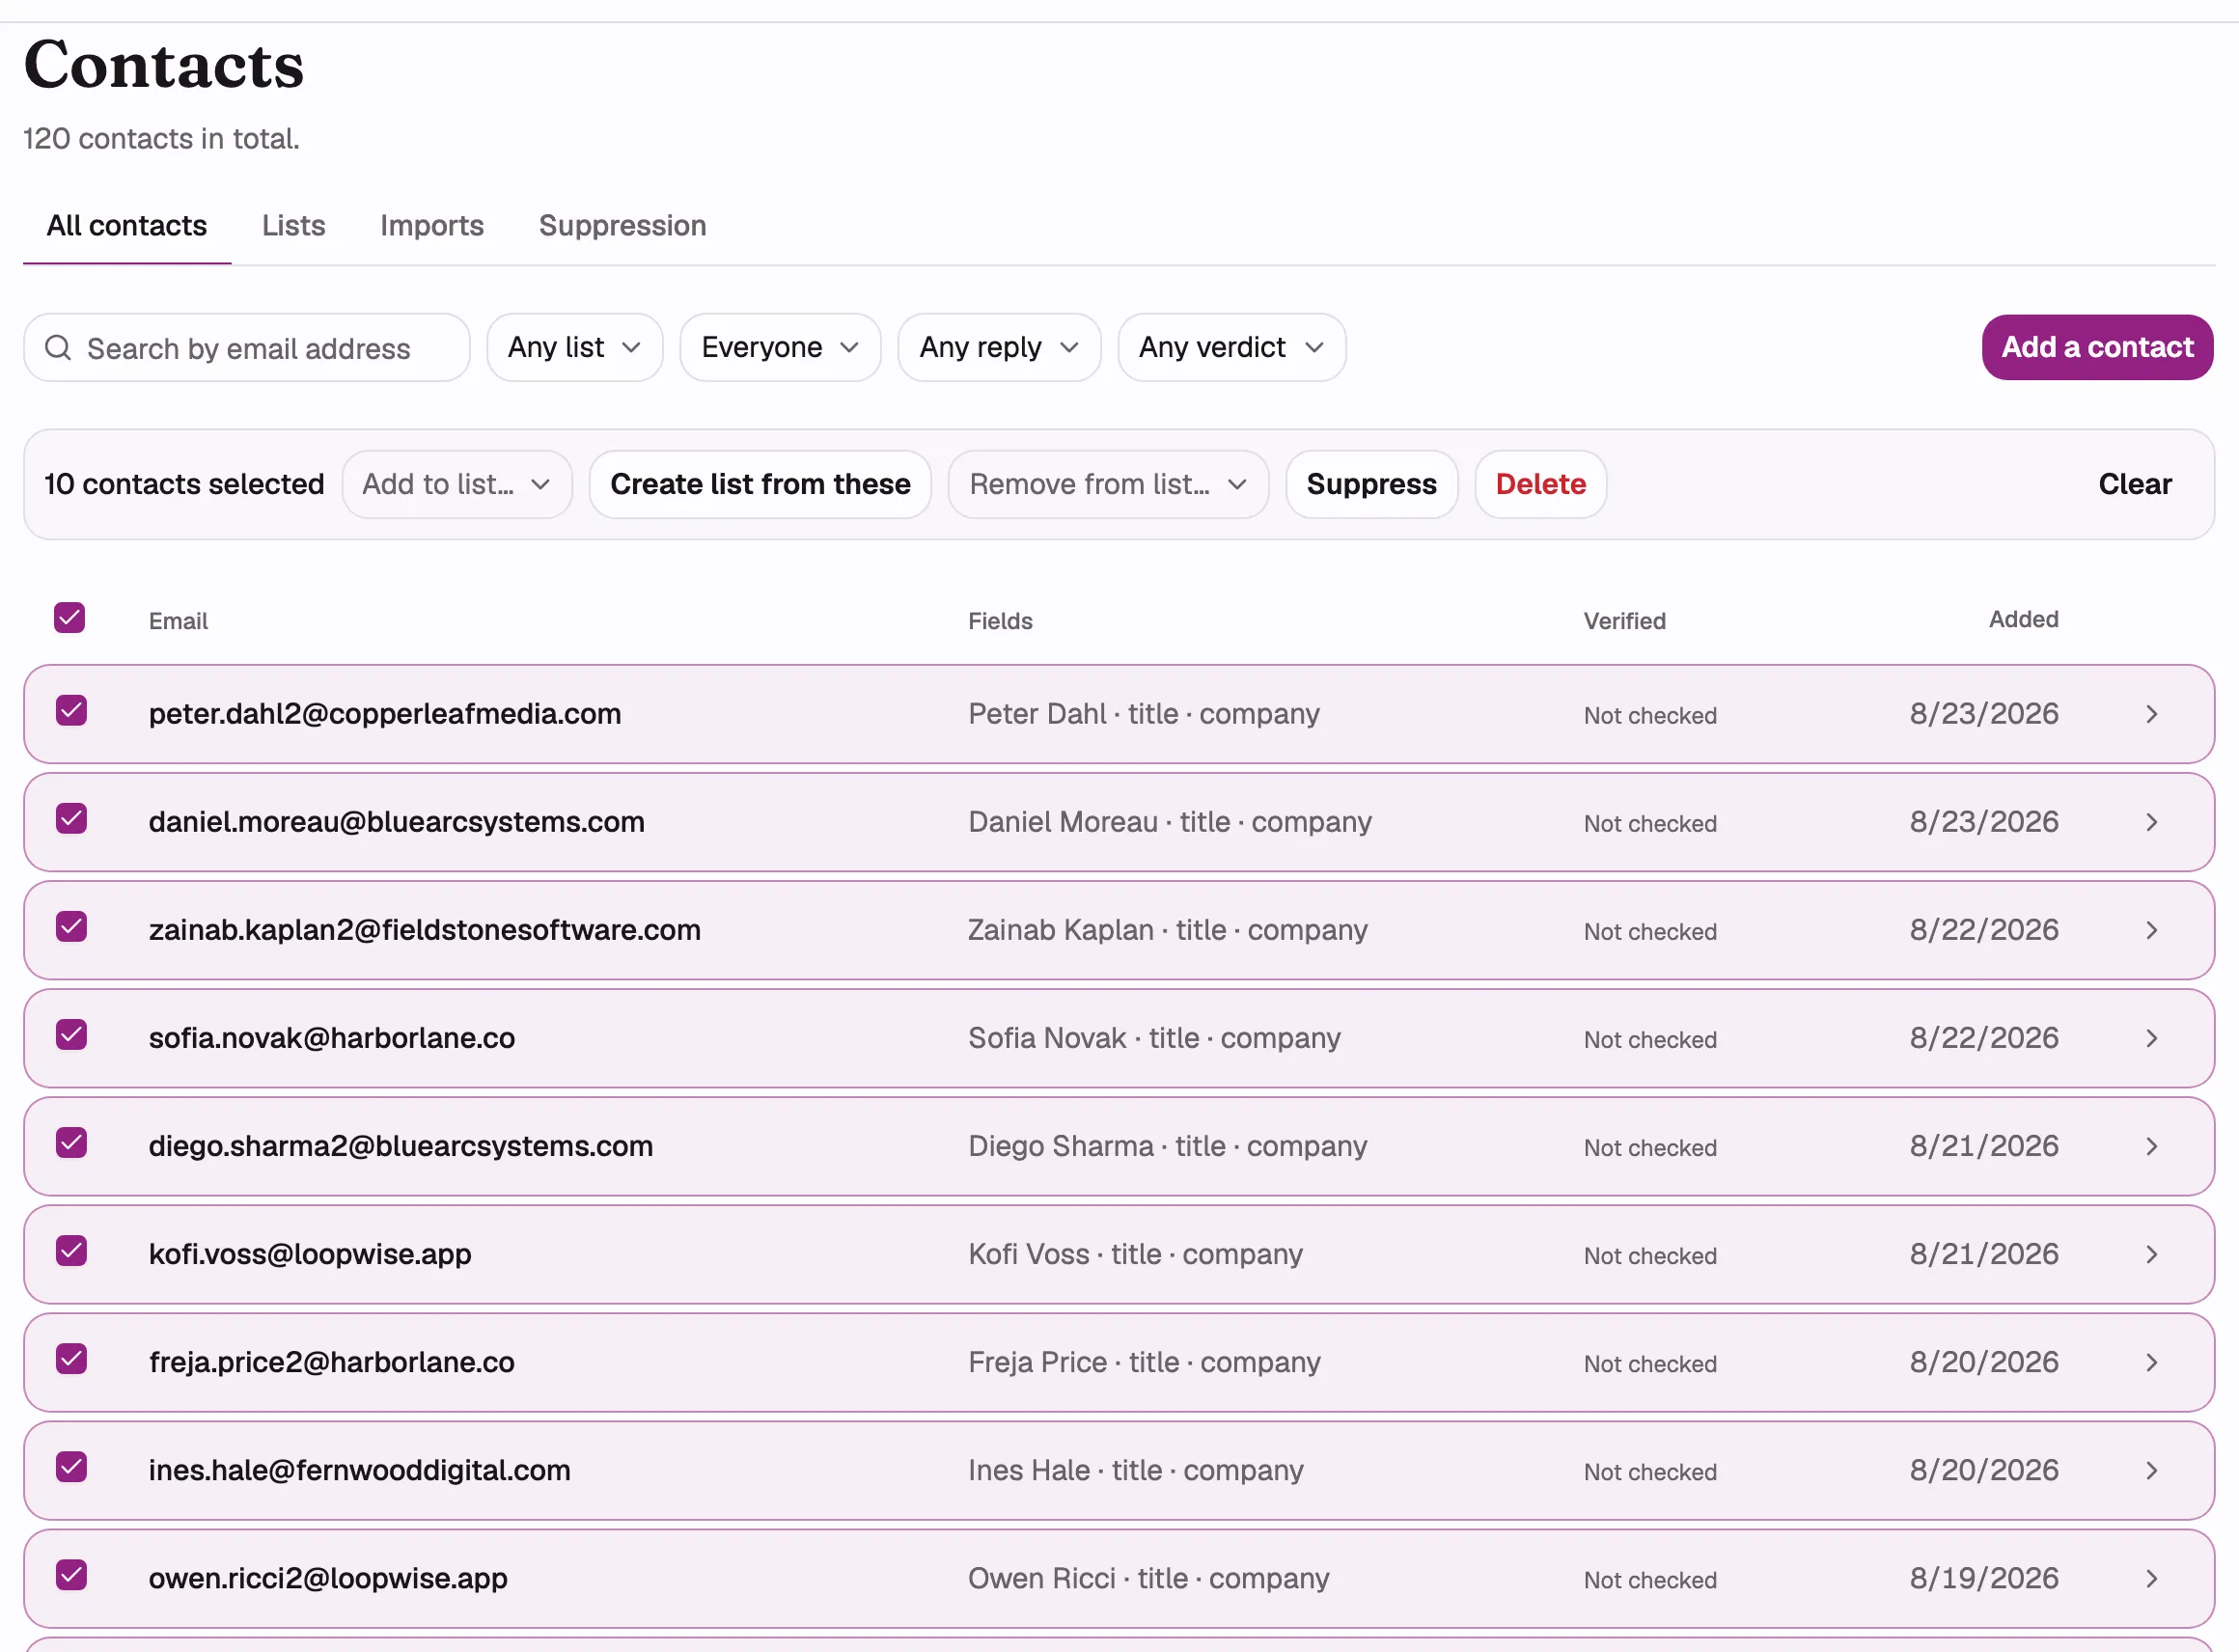
Section titled “Act on several people at once”Tick the checkbox on any row and a bar appears with five actions. Select everyone on this page at the top of the checkbox column ticks the whole page.
Add to list
Section titled “Add to list”Open the Add to list… picker and choose a list. You are asked to confirm, and told that anyone already on that list is left as they are. The picker also offers Create a new list…, which opens the naming step below without making you leave the screen first.
Create list from these
Section titled “Create list from these”Select Create list from these, name the list, and select Create list. The list is created, the ticked people are added to it, and you land inside the new list. Everyone stays on any list they were already on.
If the name is already taken, ColdMerge refuses before adding anybody and offers to open the list that holds the name.
Remove from list
Section titled “Remove from list”Open the Remove from list… picker and choose a list. Nobody is deleted; they just come off that one list. The confirmation warns you that the selection clears afterwards, so undoing this means finding those people again.
Suppress
Section titled “Suppress”Select Suppress to add everyone selected to your suppression list. Every send and every future import skips them from that moment on. Only an Owner or an Admin can undo it, and some suppressions can never be undone. Read unsubscribes and suppression before you use this.
Delete
Section titled “Delete”Select Delete to remove people for good. Anyone you have already emailed is kept rather than deleted, and the result tells you how many were kept for that reason. To remove someone with message history, use Erase on their own page. See contact details, custom fields, and removal.
The selection cap
Section titled “The selection cap”You can act on 1,000 contacts at once. Once the selection is full, ticking another row does nothing and a message says so. There is no “select everything that matches this filter” control, on purpose: a bulk action should only ever reach a set of people you could count.
To act on more than 1,000 people, narrow the filters, act on that set, then move on to the next.
Open one contact
Section titled “Open one contact”Select a row, or the chevron at the end of it, to open that person’s own page.